
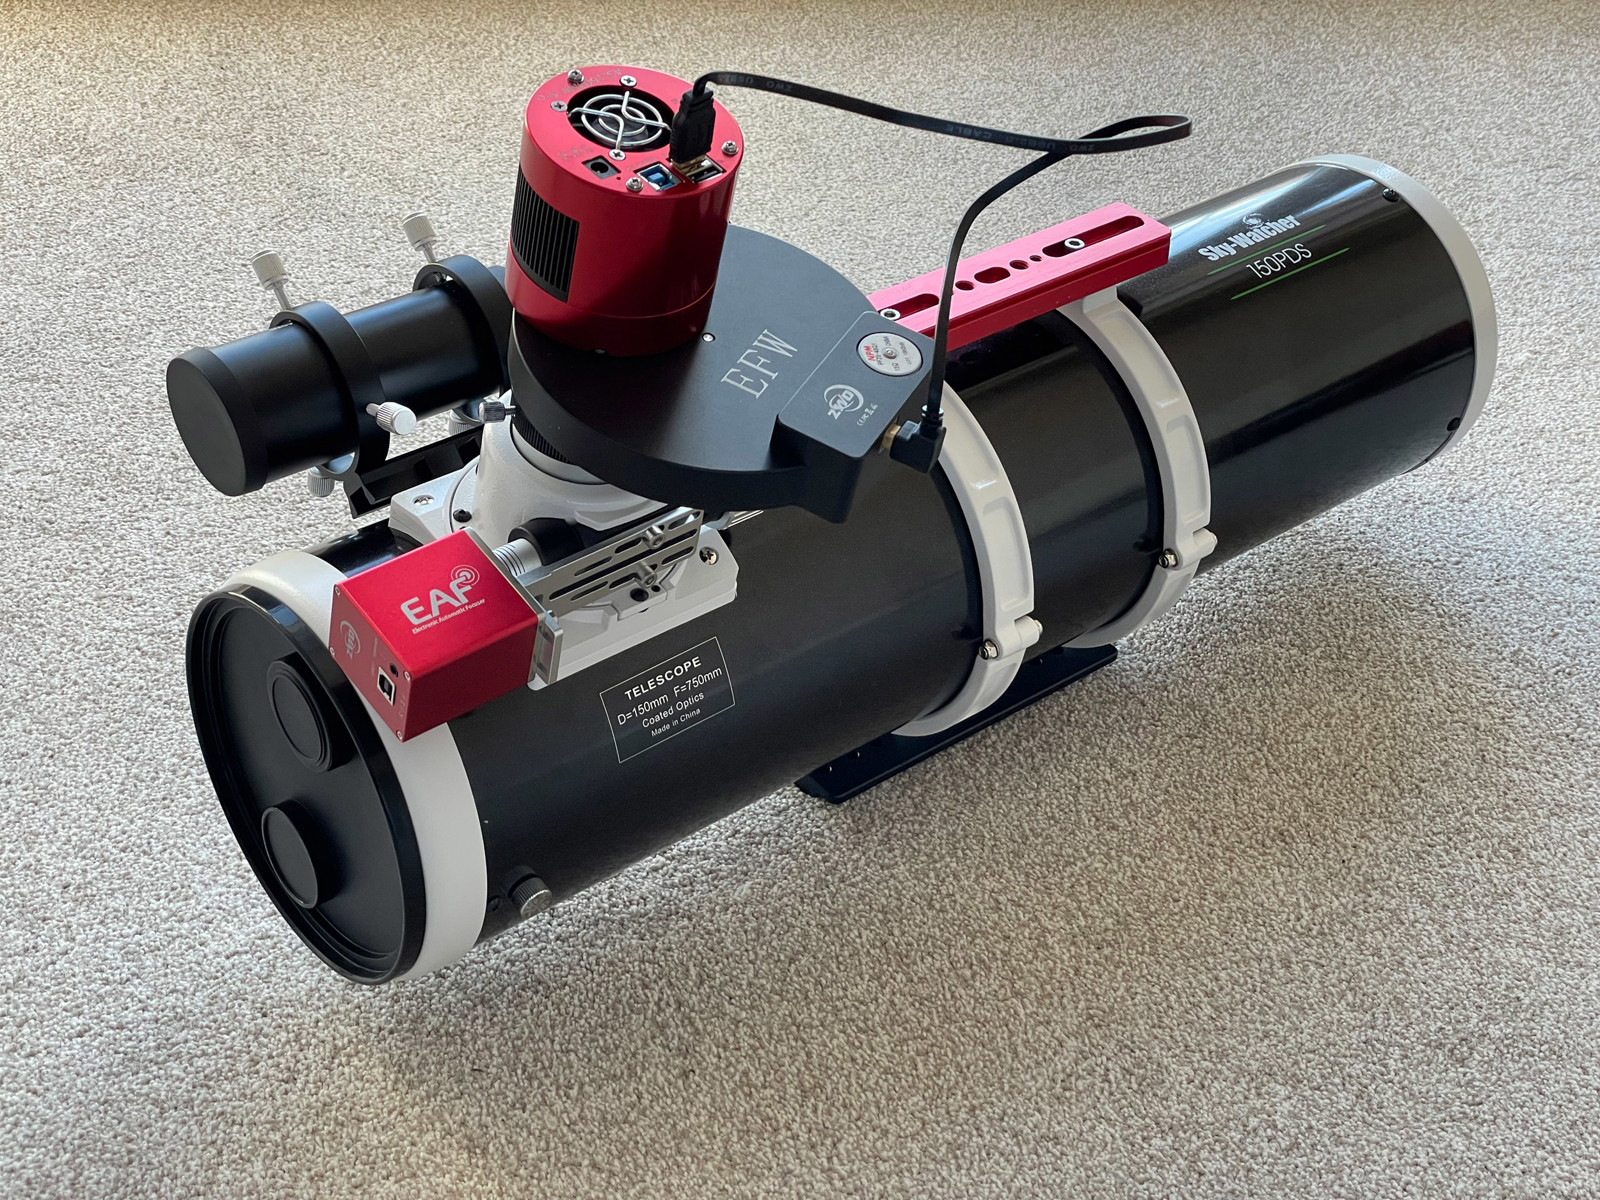
For the last year the only telescope I owned was a bulky 10" Newtonian. Whilst it is probably the best scope I've ever had I was starting find I was missing some partially clear nights due to the scope being so big and heavy that there is little point setting it up if it's only going the clear for a few hours.
So I decided it would be handy to have a smaller scope to hand, something light and easy to setup (and take down quickly if the weather turns bad). After a bit of research the SkyWatcher 130PDS seems a superb scope for such a setup but as I've recently switched to a bigger mount I was concerned it would be too small to balance on the CEM120 for which the smallest counterweigh I have is 10kg.
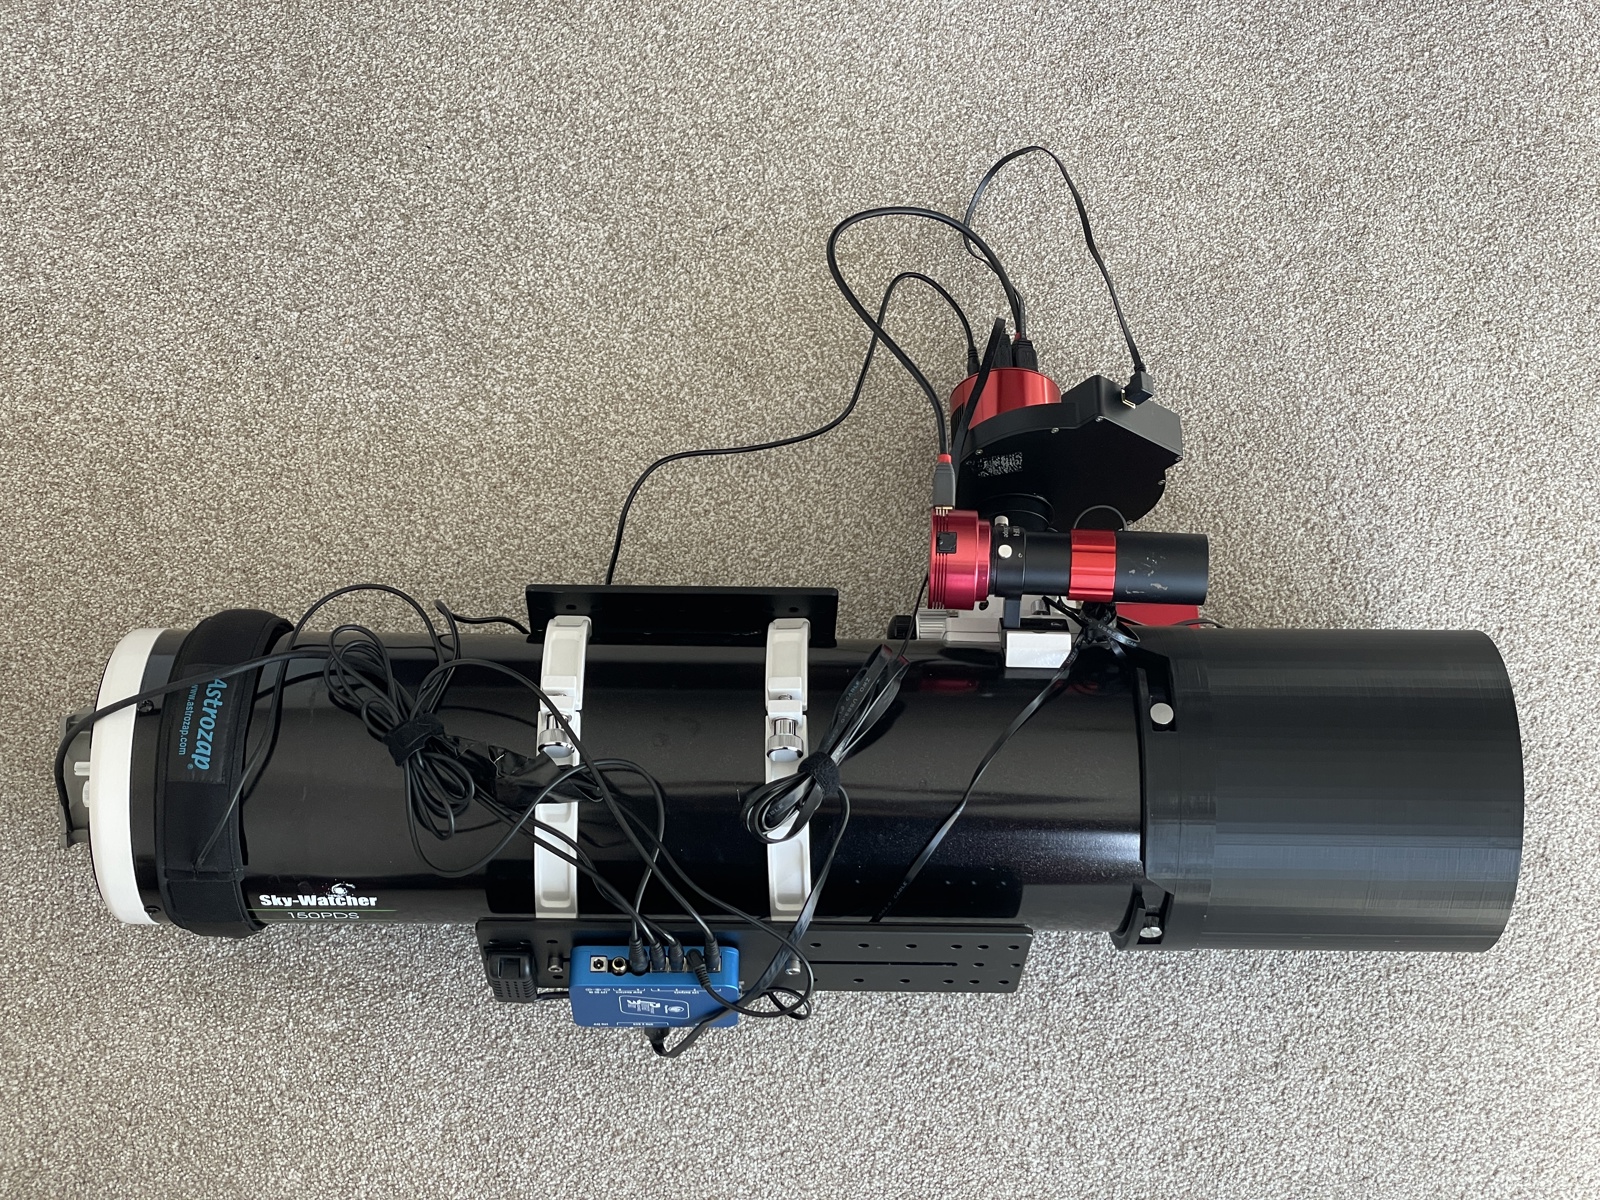
So I purchased a SkyWatcher 150PDS. This is still very compact telescope but weighs in at around 9kg so once camera and guide scope are added it should be OK on my existing mount.
The scope however does need a number of modifications to get the best performance for astrophotography so I compiled a list of the modifications I have made to the scope.
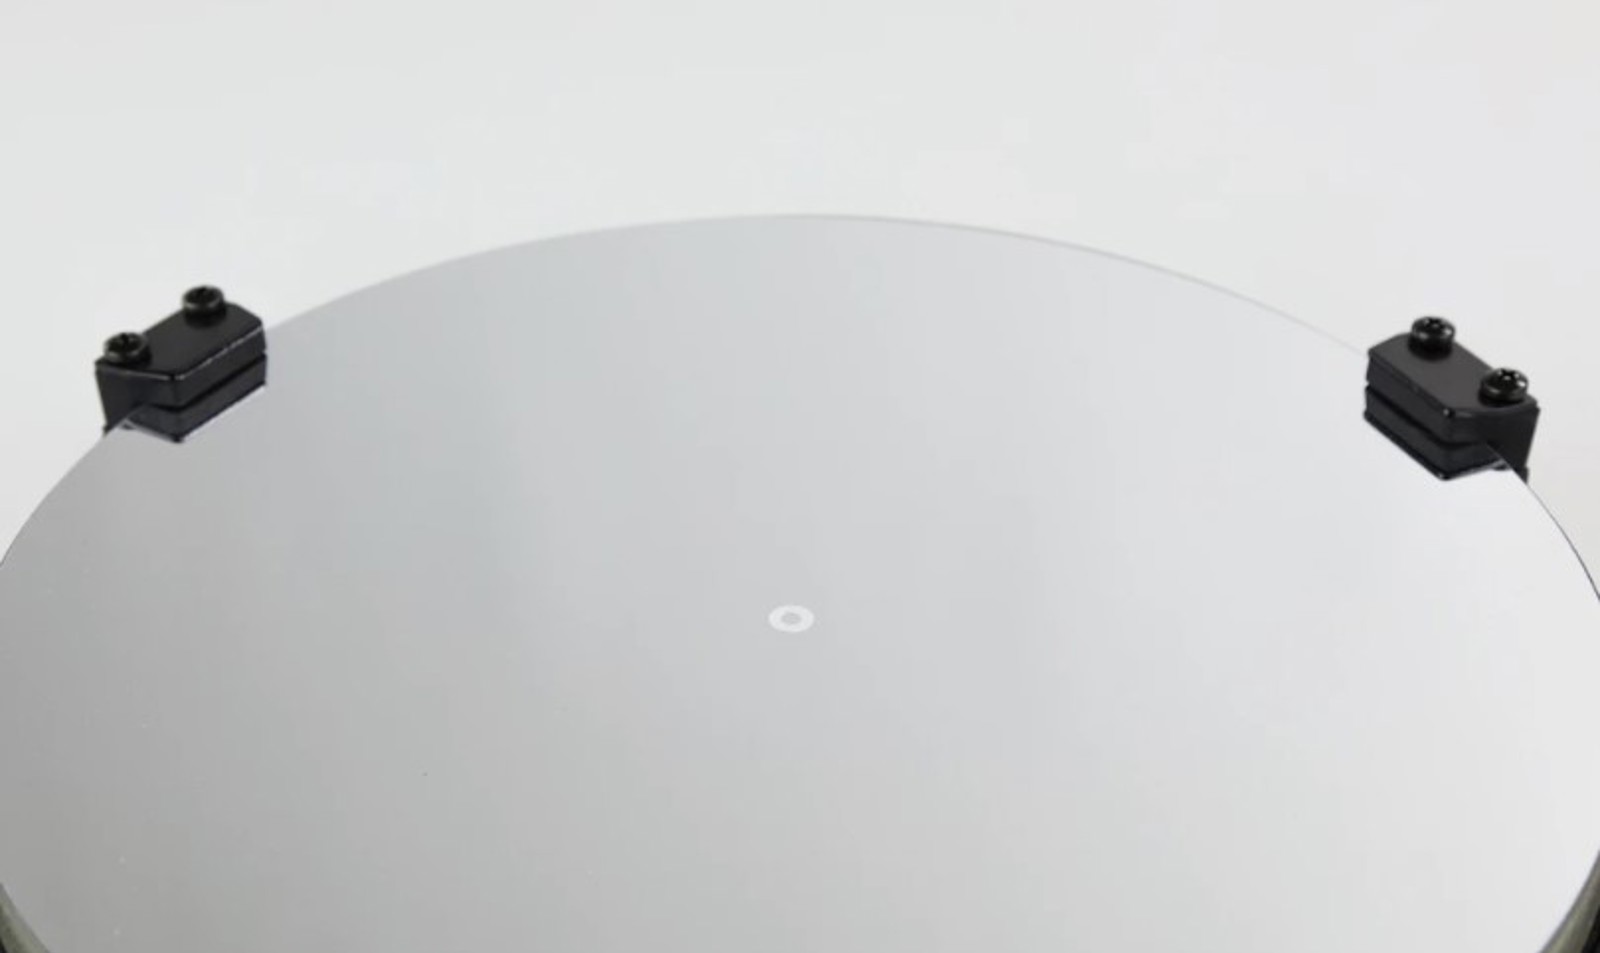
Mirror Clips
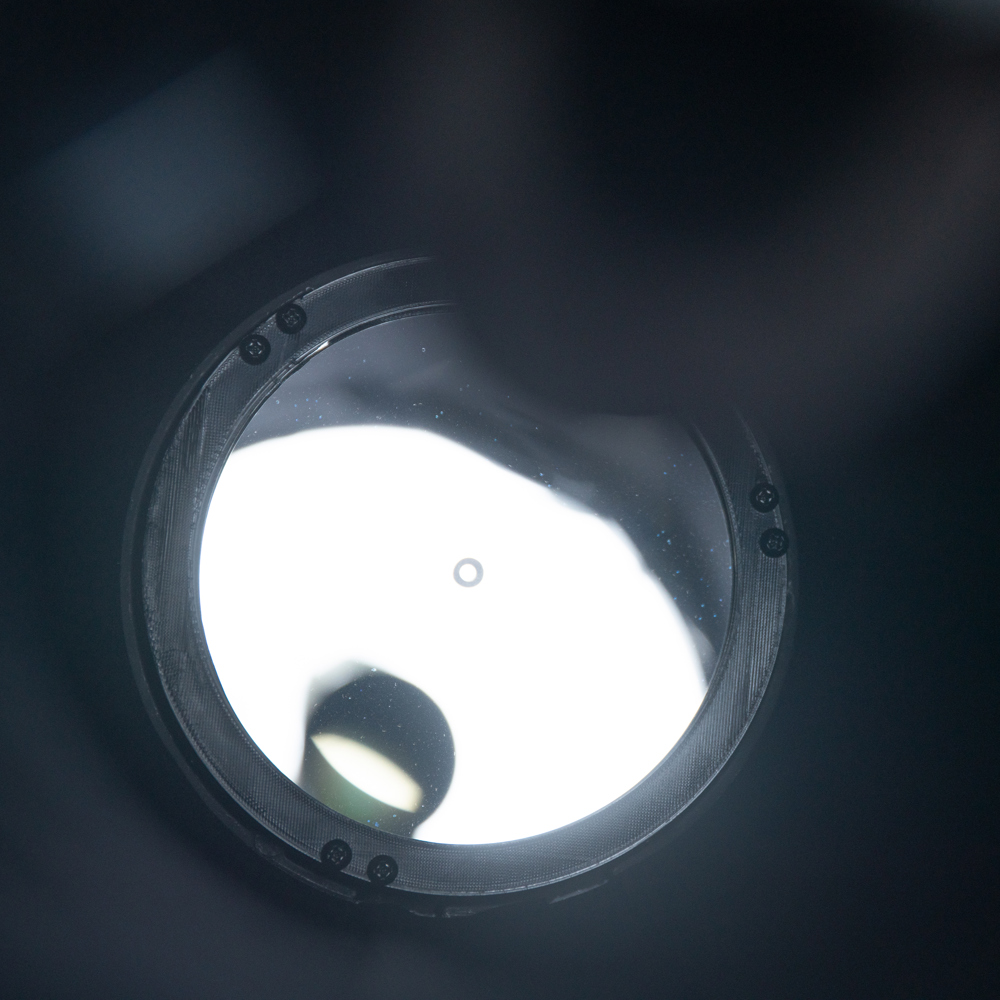
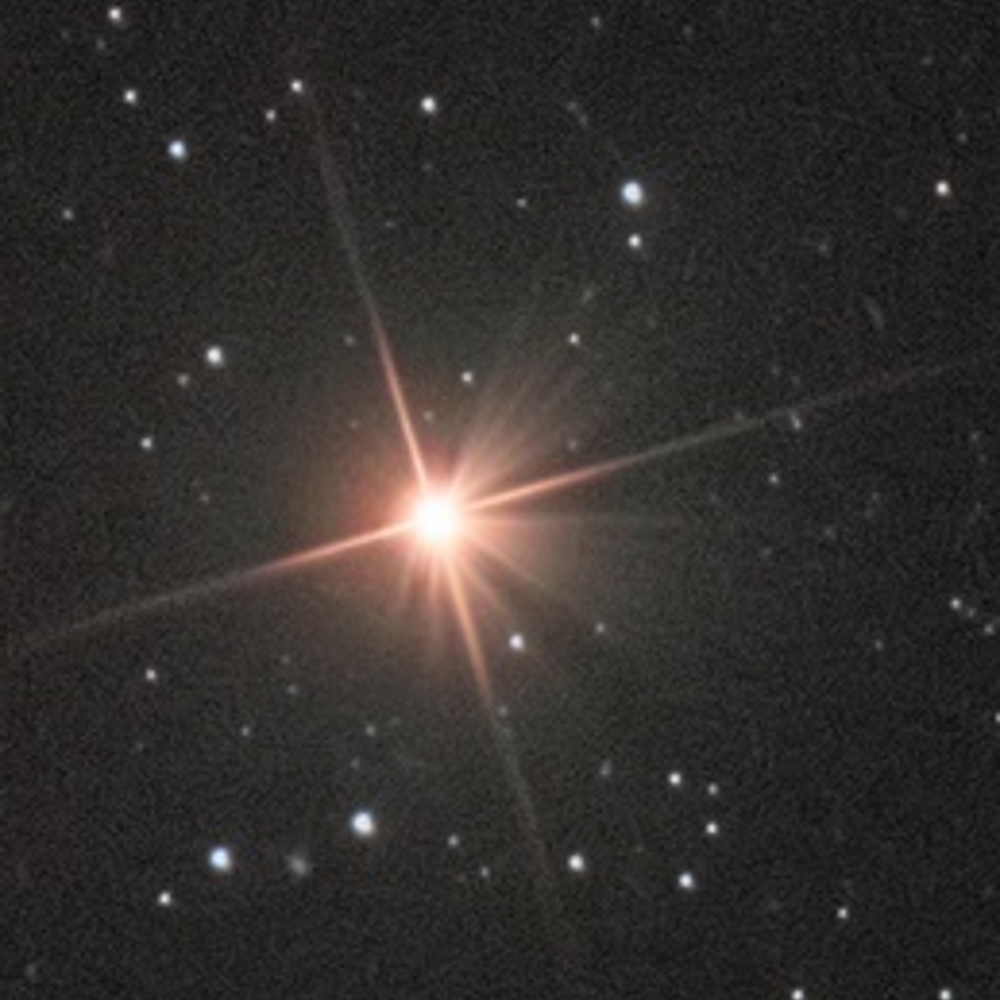
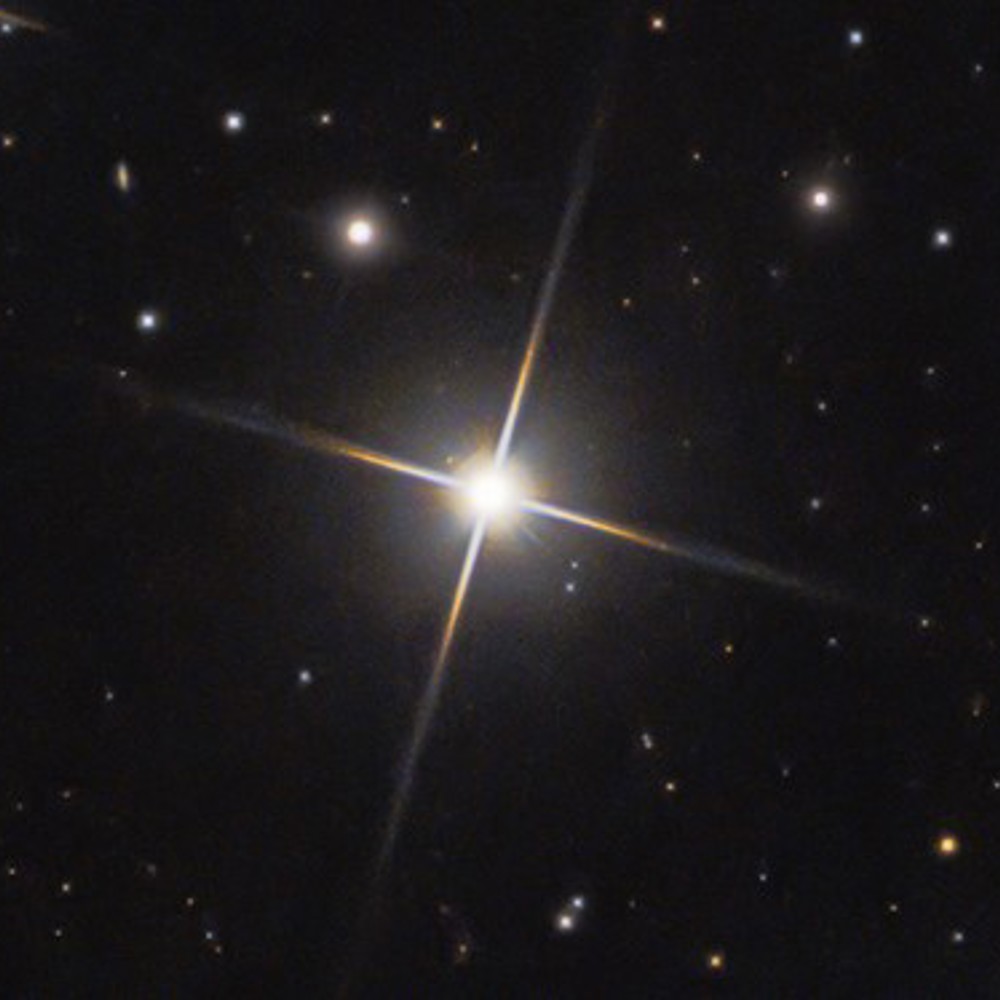
To get clean diffraction spikes on most Sky Watcher Newtonians you need to add an aperture mask just above the mirror to mask out the mirror clips which protrude into the mirror surface area.
This mod makes a massive difference - look at the example stars below showing a bright start without an aperture mask installed and then with an aperture mask installed.
For the 150PDS I 3D printed this excellent Aperture Mask on Thingiverse. This one is screwed into place with the existing mirror clip screws but you could just as easily use velcro to attach it above the mirror clips.
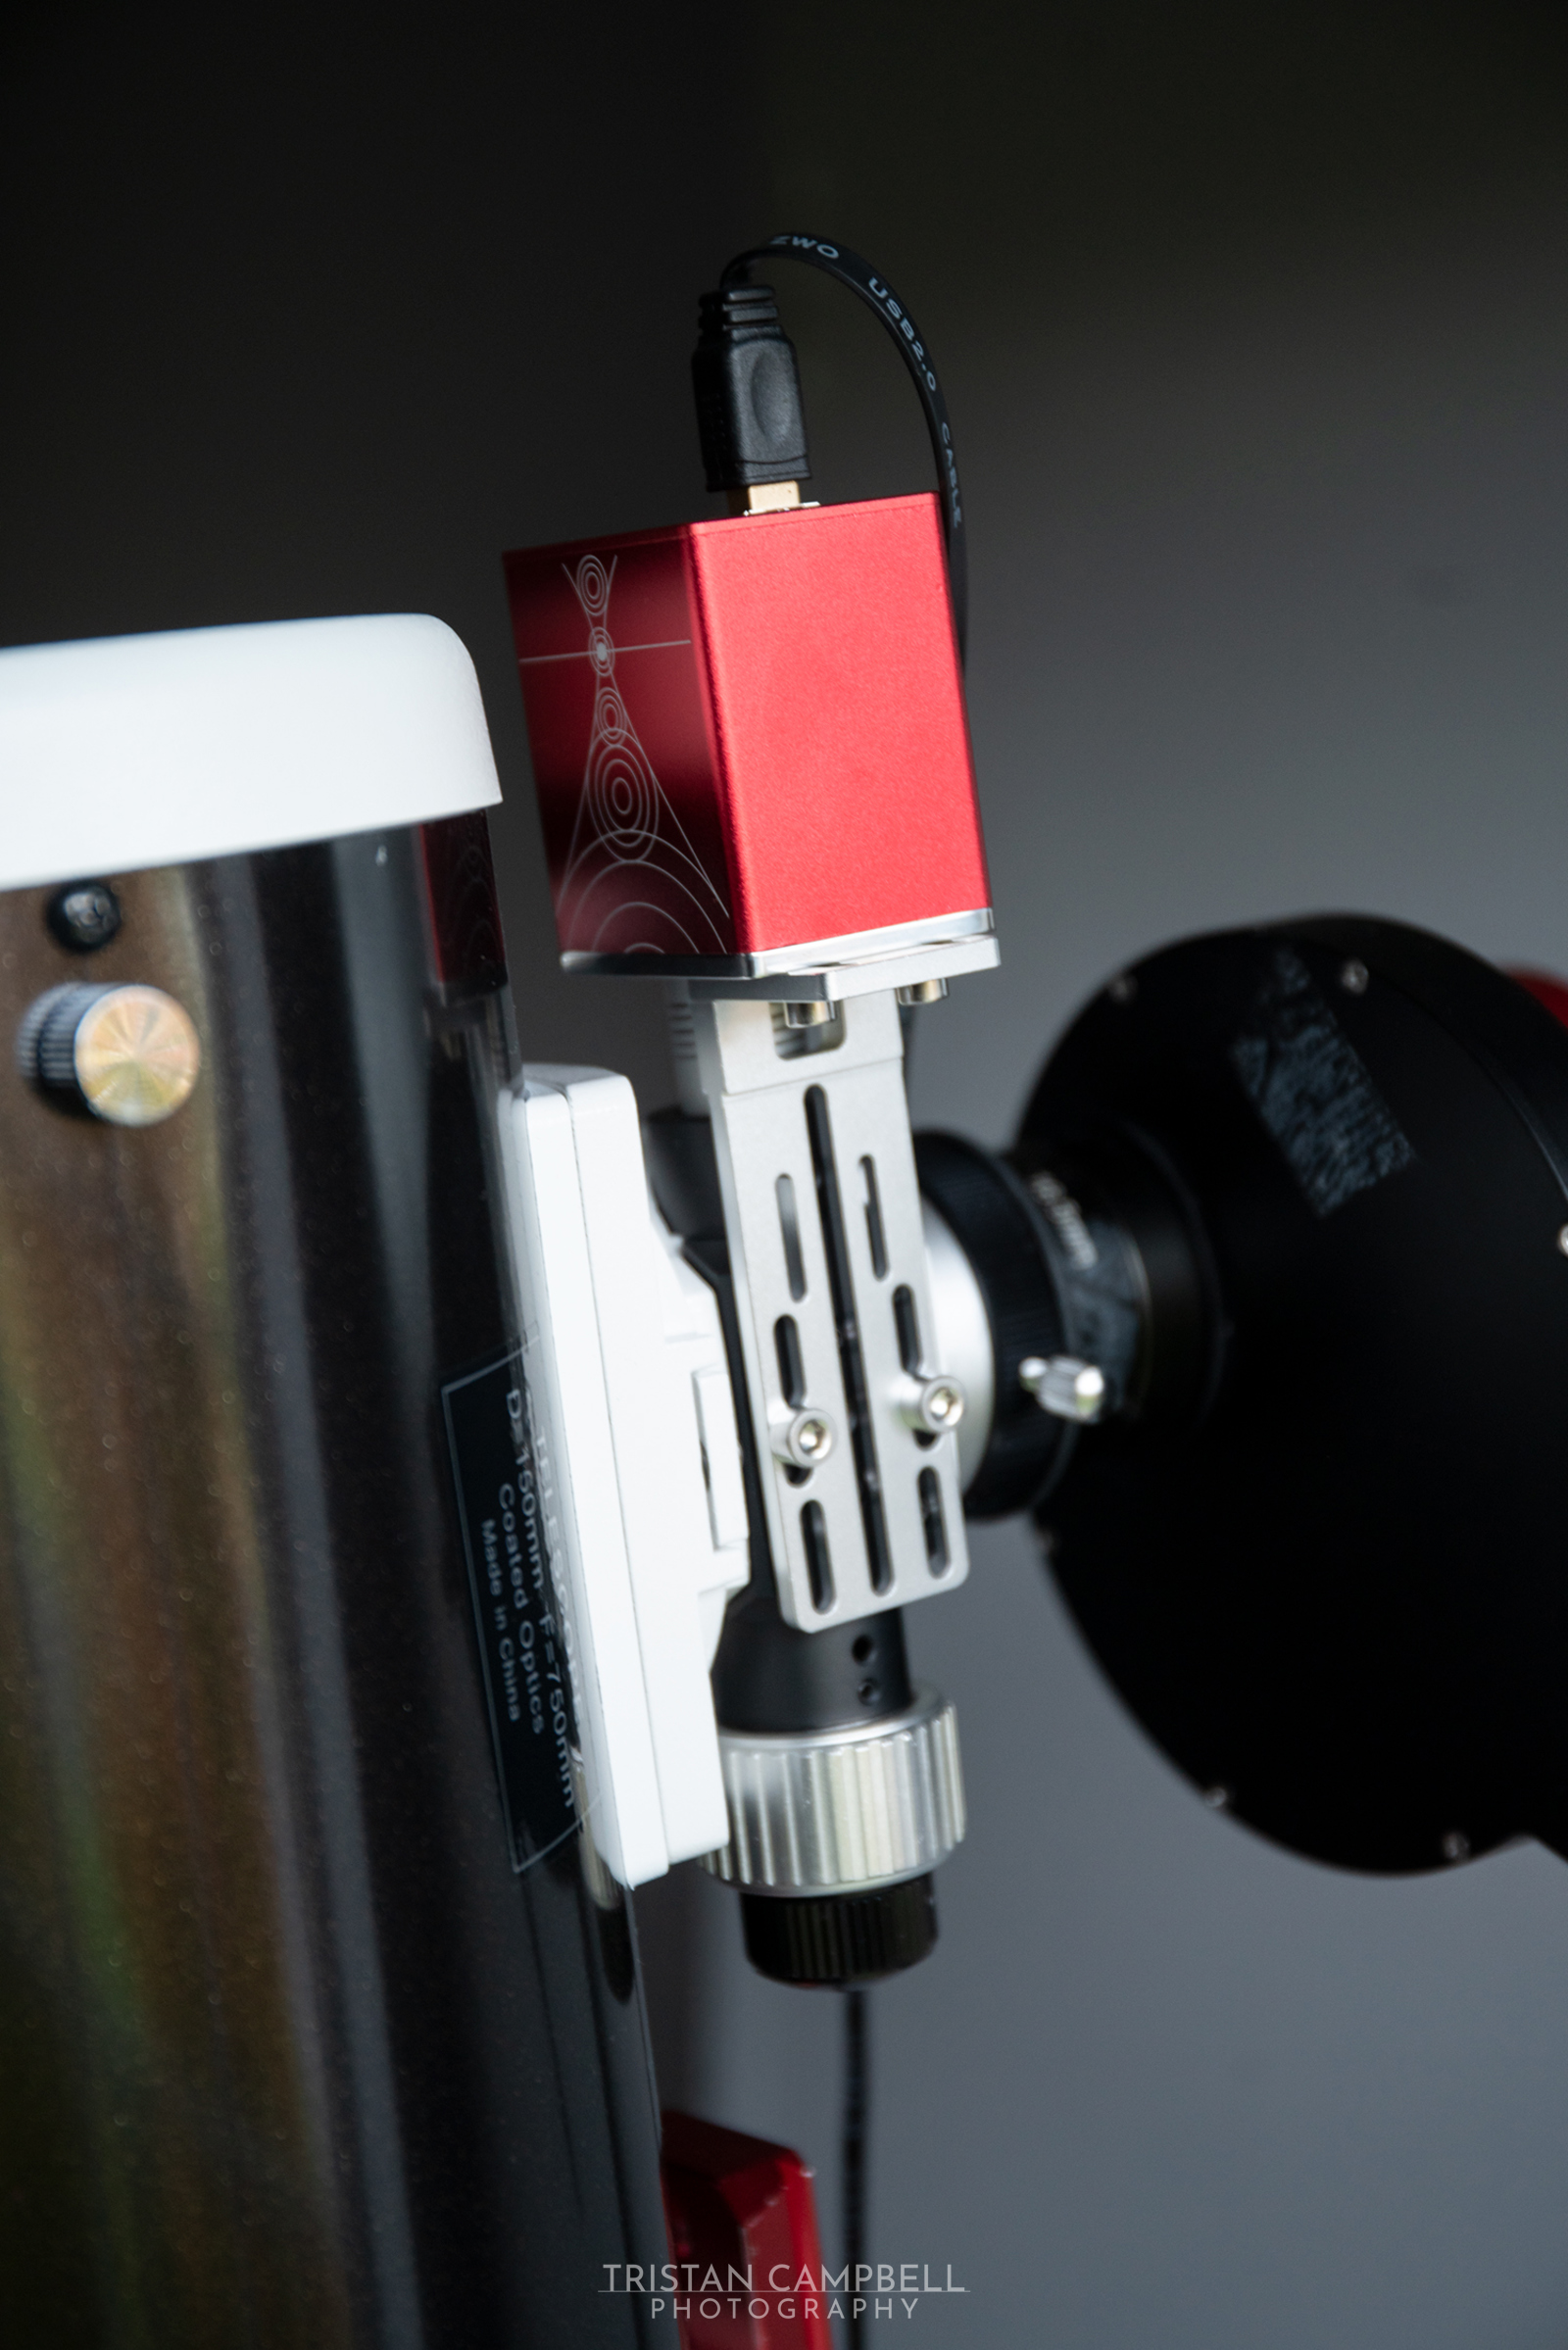
Focus motor
This isn't really a mod but is absolutely essential for astrophotography. There are many options available but I already had a ZWO EAF so I've installed that. If you take a hacksaw to the drawtube just be careful to limit the focus so that the draw tube doesn't disconnect from the focuser (fixing that would be another easy mod).
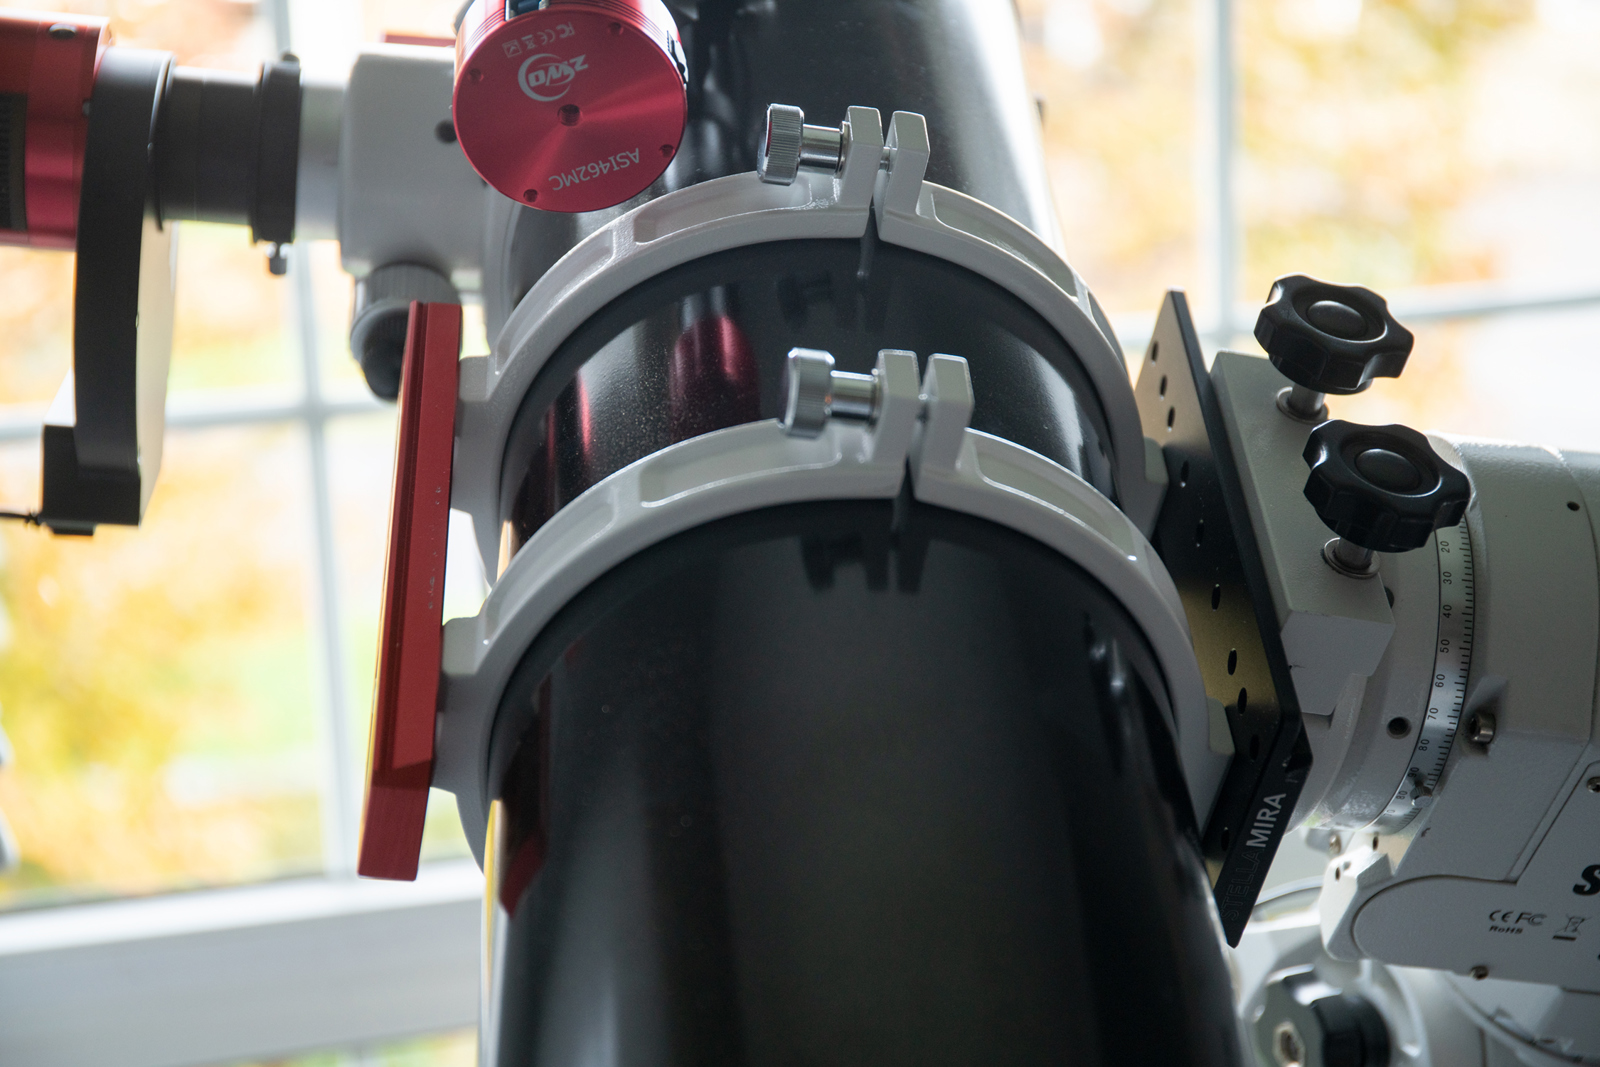
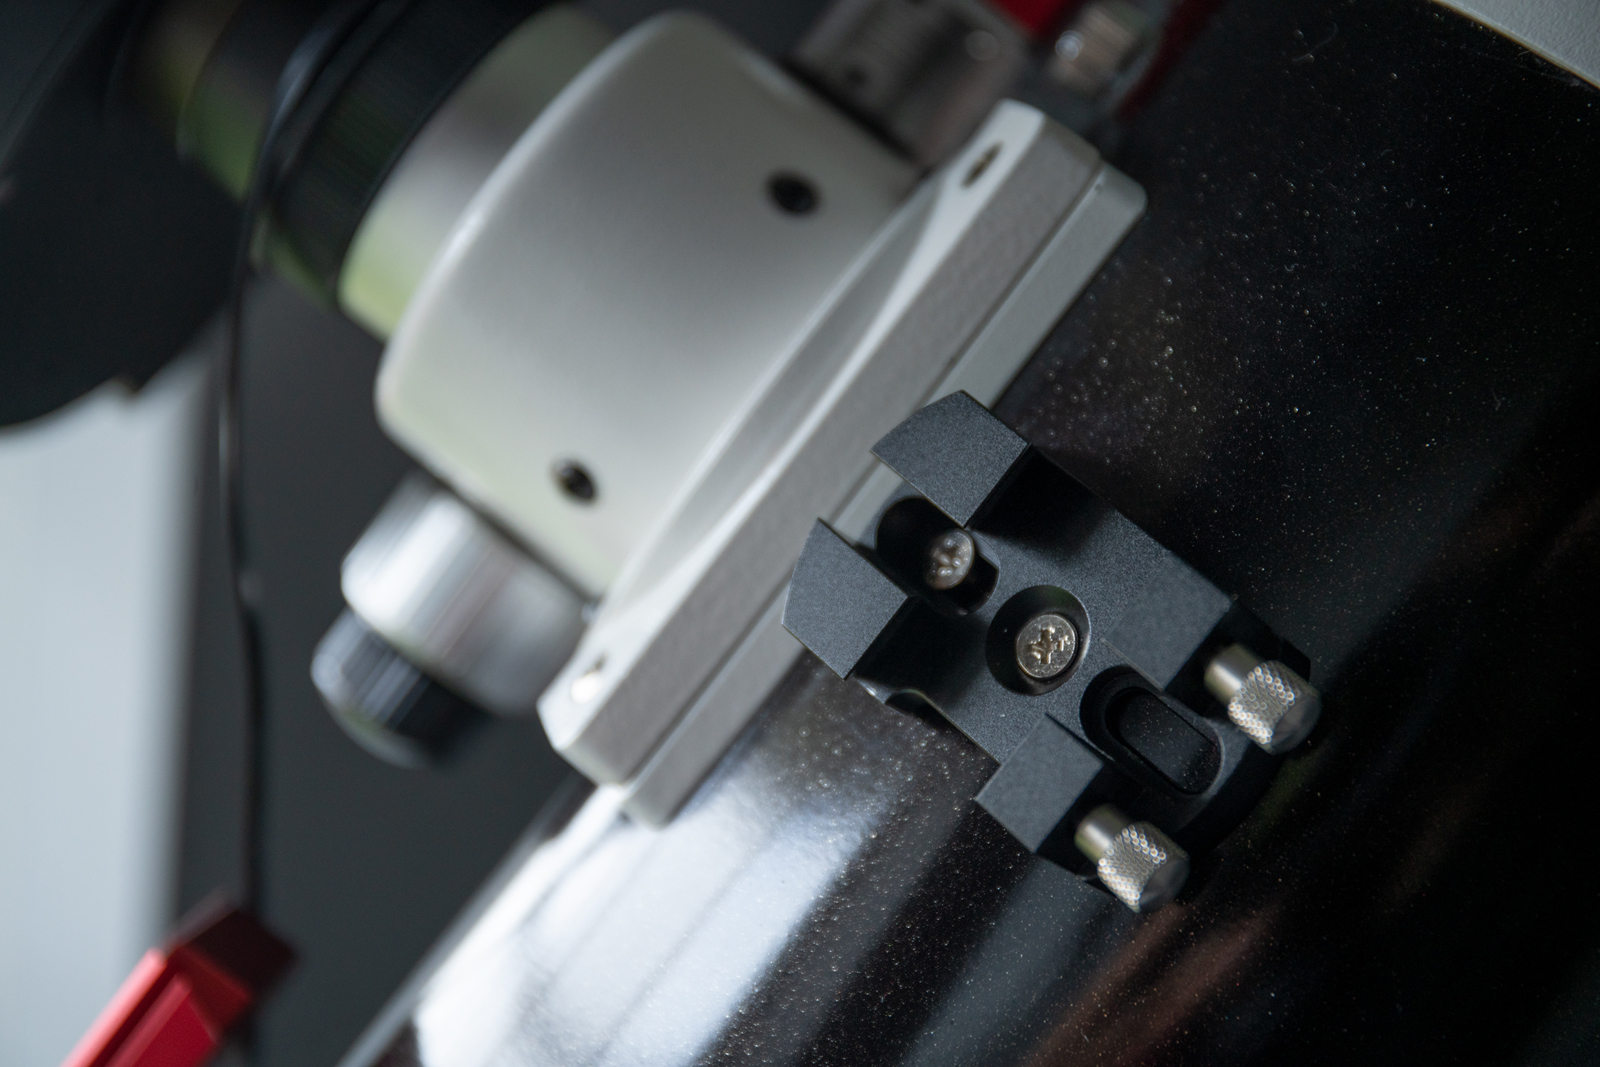
Dovetail
The scope comes with a small vixen style dovetail. My mount won't accept Vixen dovetails so I had to swap this but it's a great upgrade regardless. Once swapped out to a larger Losmandy dovetail the connection to the mount is far more sturdy. I also added a second smaller dovetail to the top end of the tube rings which again makes the whole thing much more sturdy and acts as a handle for easily moving the scope around.
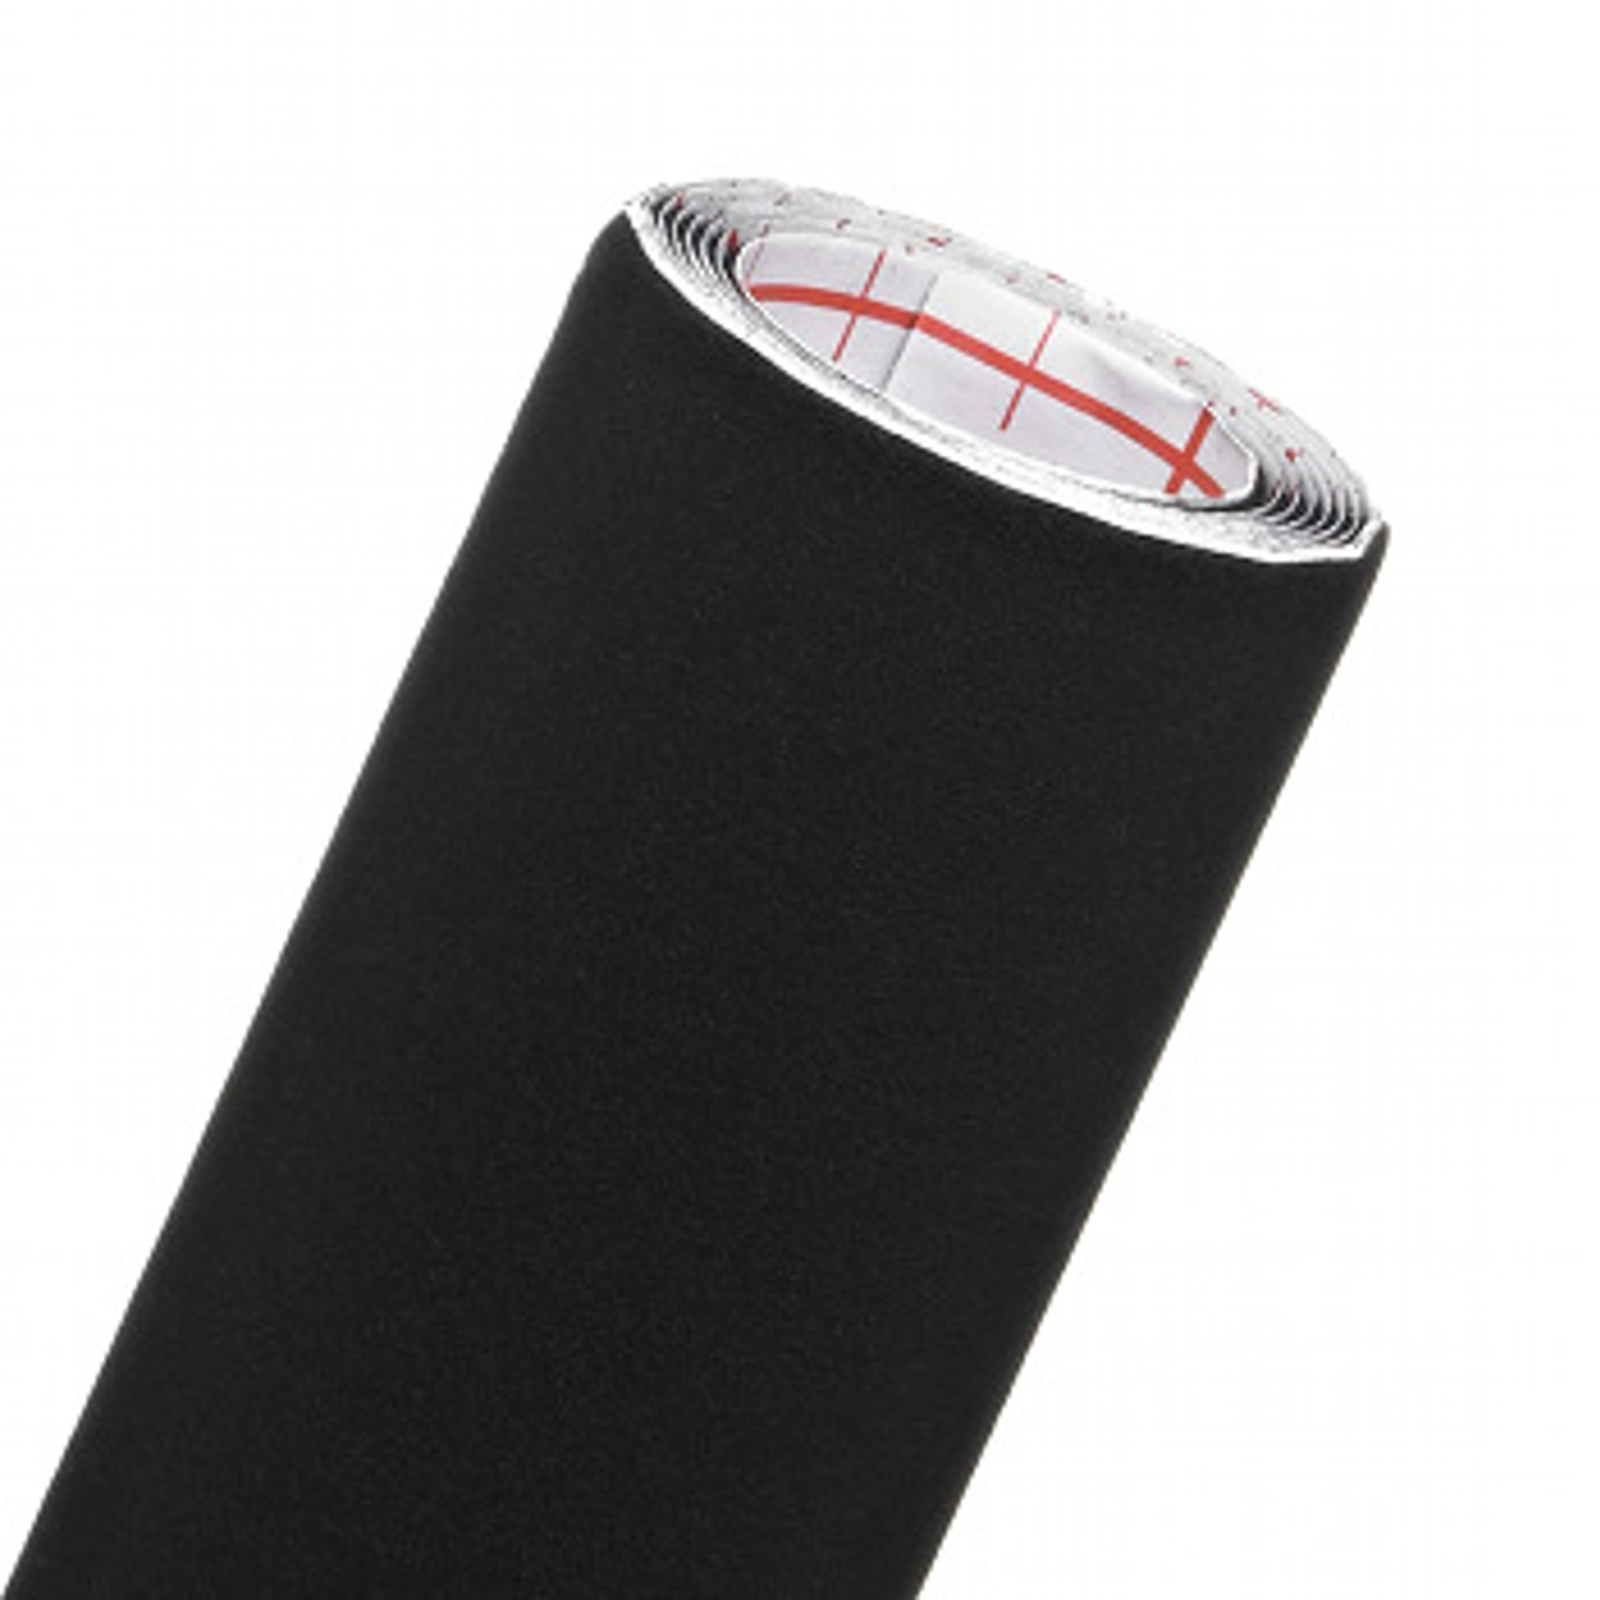
Flocking
To minimise internal reflections in the tube you can apply stick on black velour flocking material. Although the tube is already painted back on the inside this material will absorb much more light which ultimately leads to a higher contrast image.
In addition to this I have flocked the back of the mirror and also painted the edges of both primary and secondary mirror with blackboard paint.
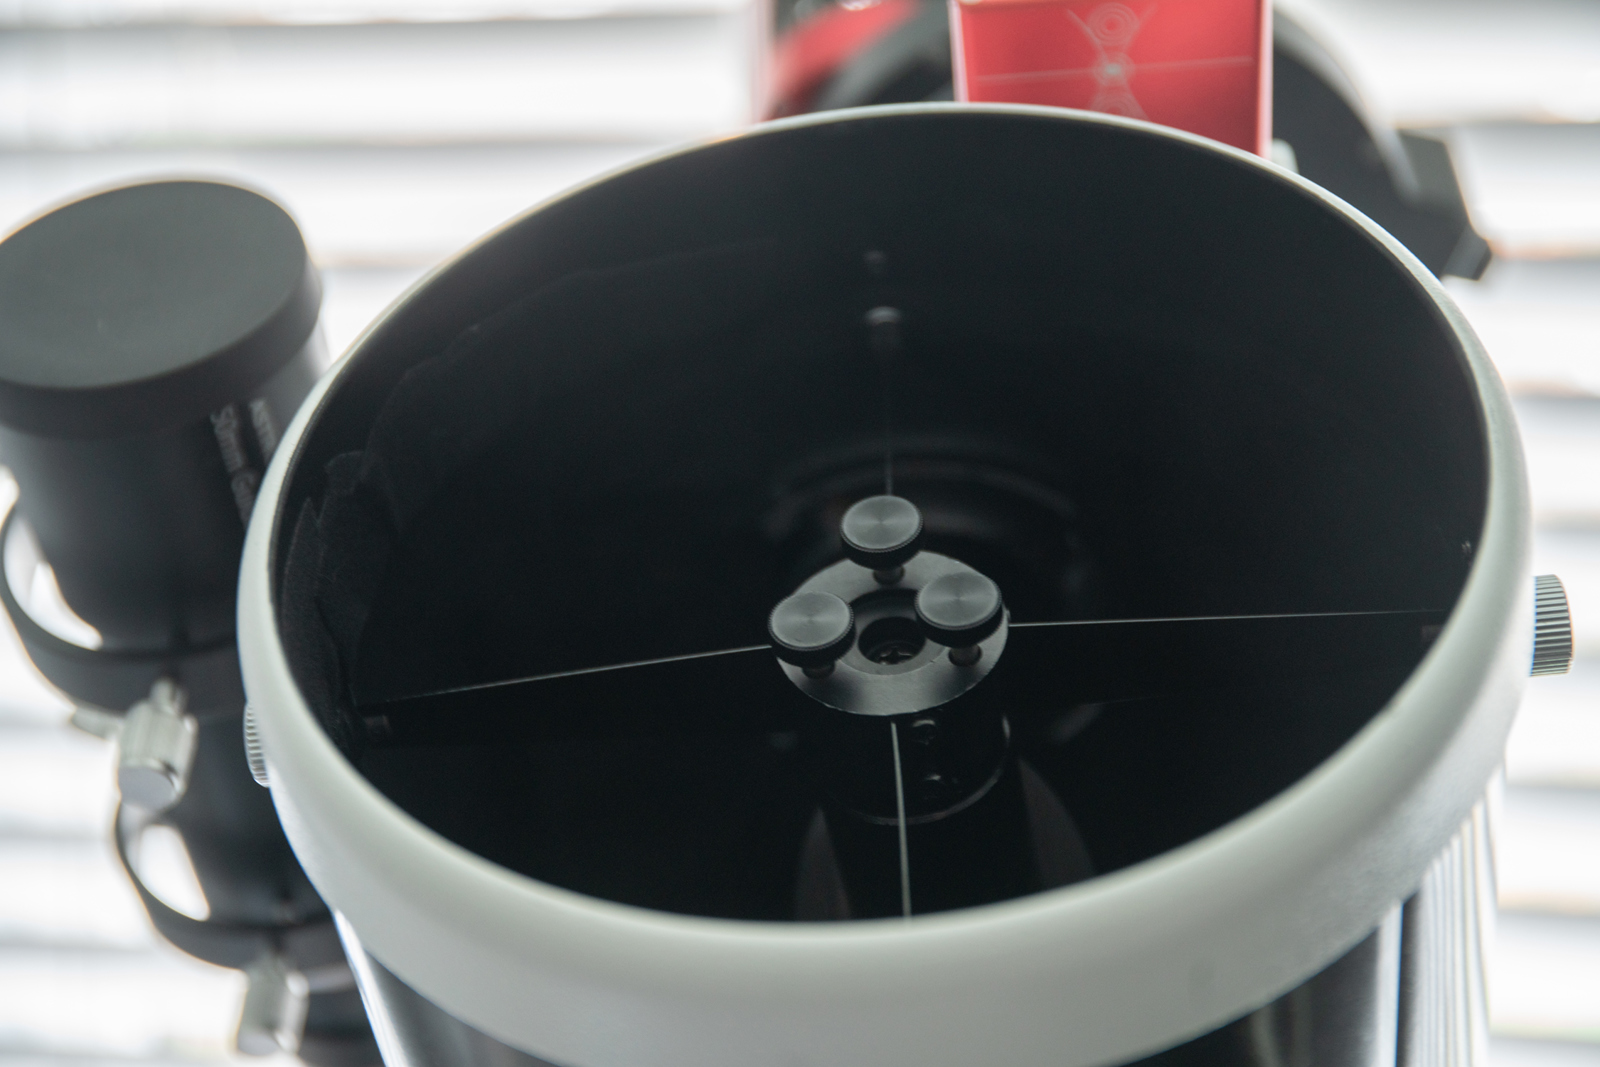
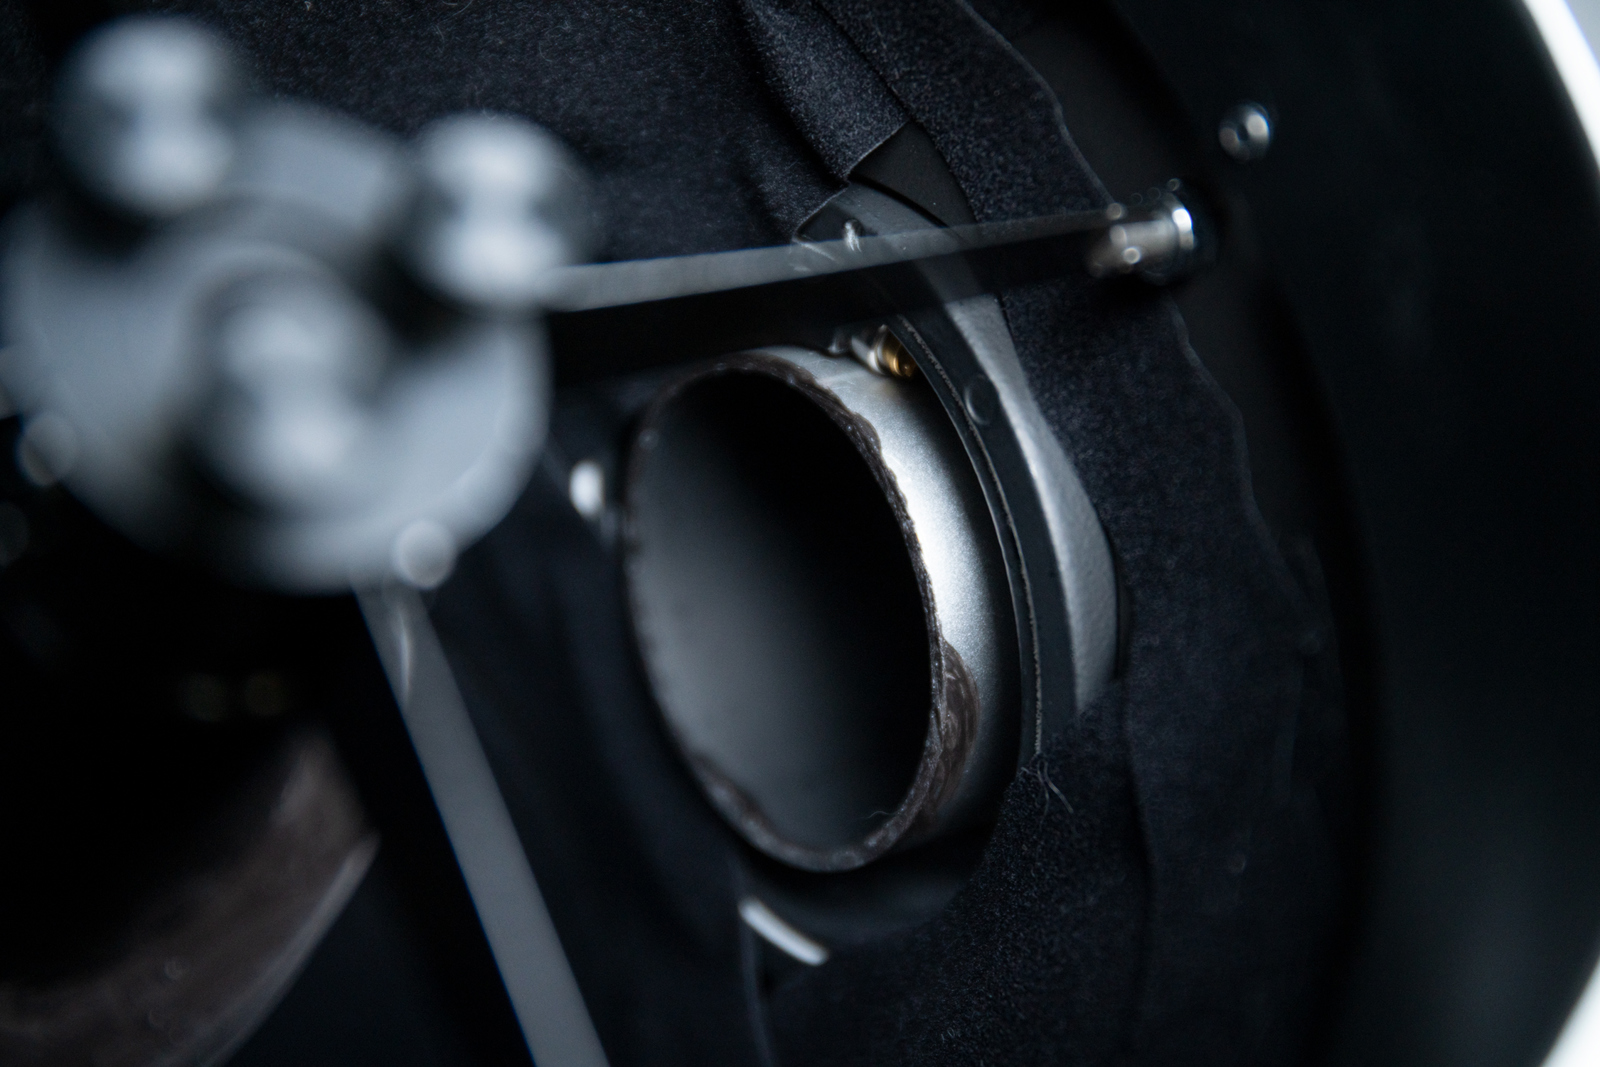
Secondary Adjustment Knobs
Sky Watcher Newtonians comes with little grub screws to adjust the secondary mirror. Although the do the job fine they are fiddly and difficult to work with. Switching them to thumb screws makes adjusting the secondary much easier.
Finderscope Shoe
This one is not essential but is nice to have. The provided Sky Watcher finder show only has one screw to hold the finder in place. Switching it to something like the Baader Univeral Finder Shoe holds the finder much more securely. There are lots of similar alternatives available.
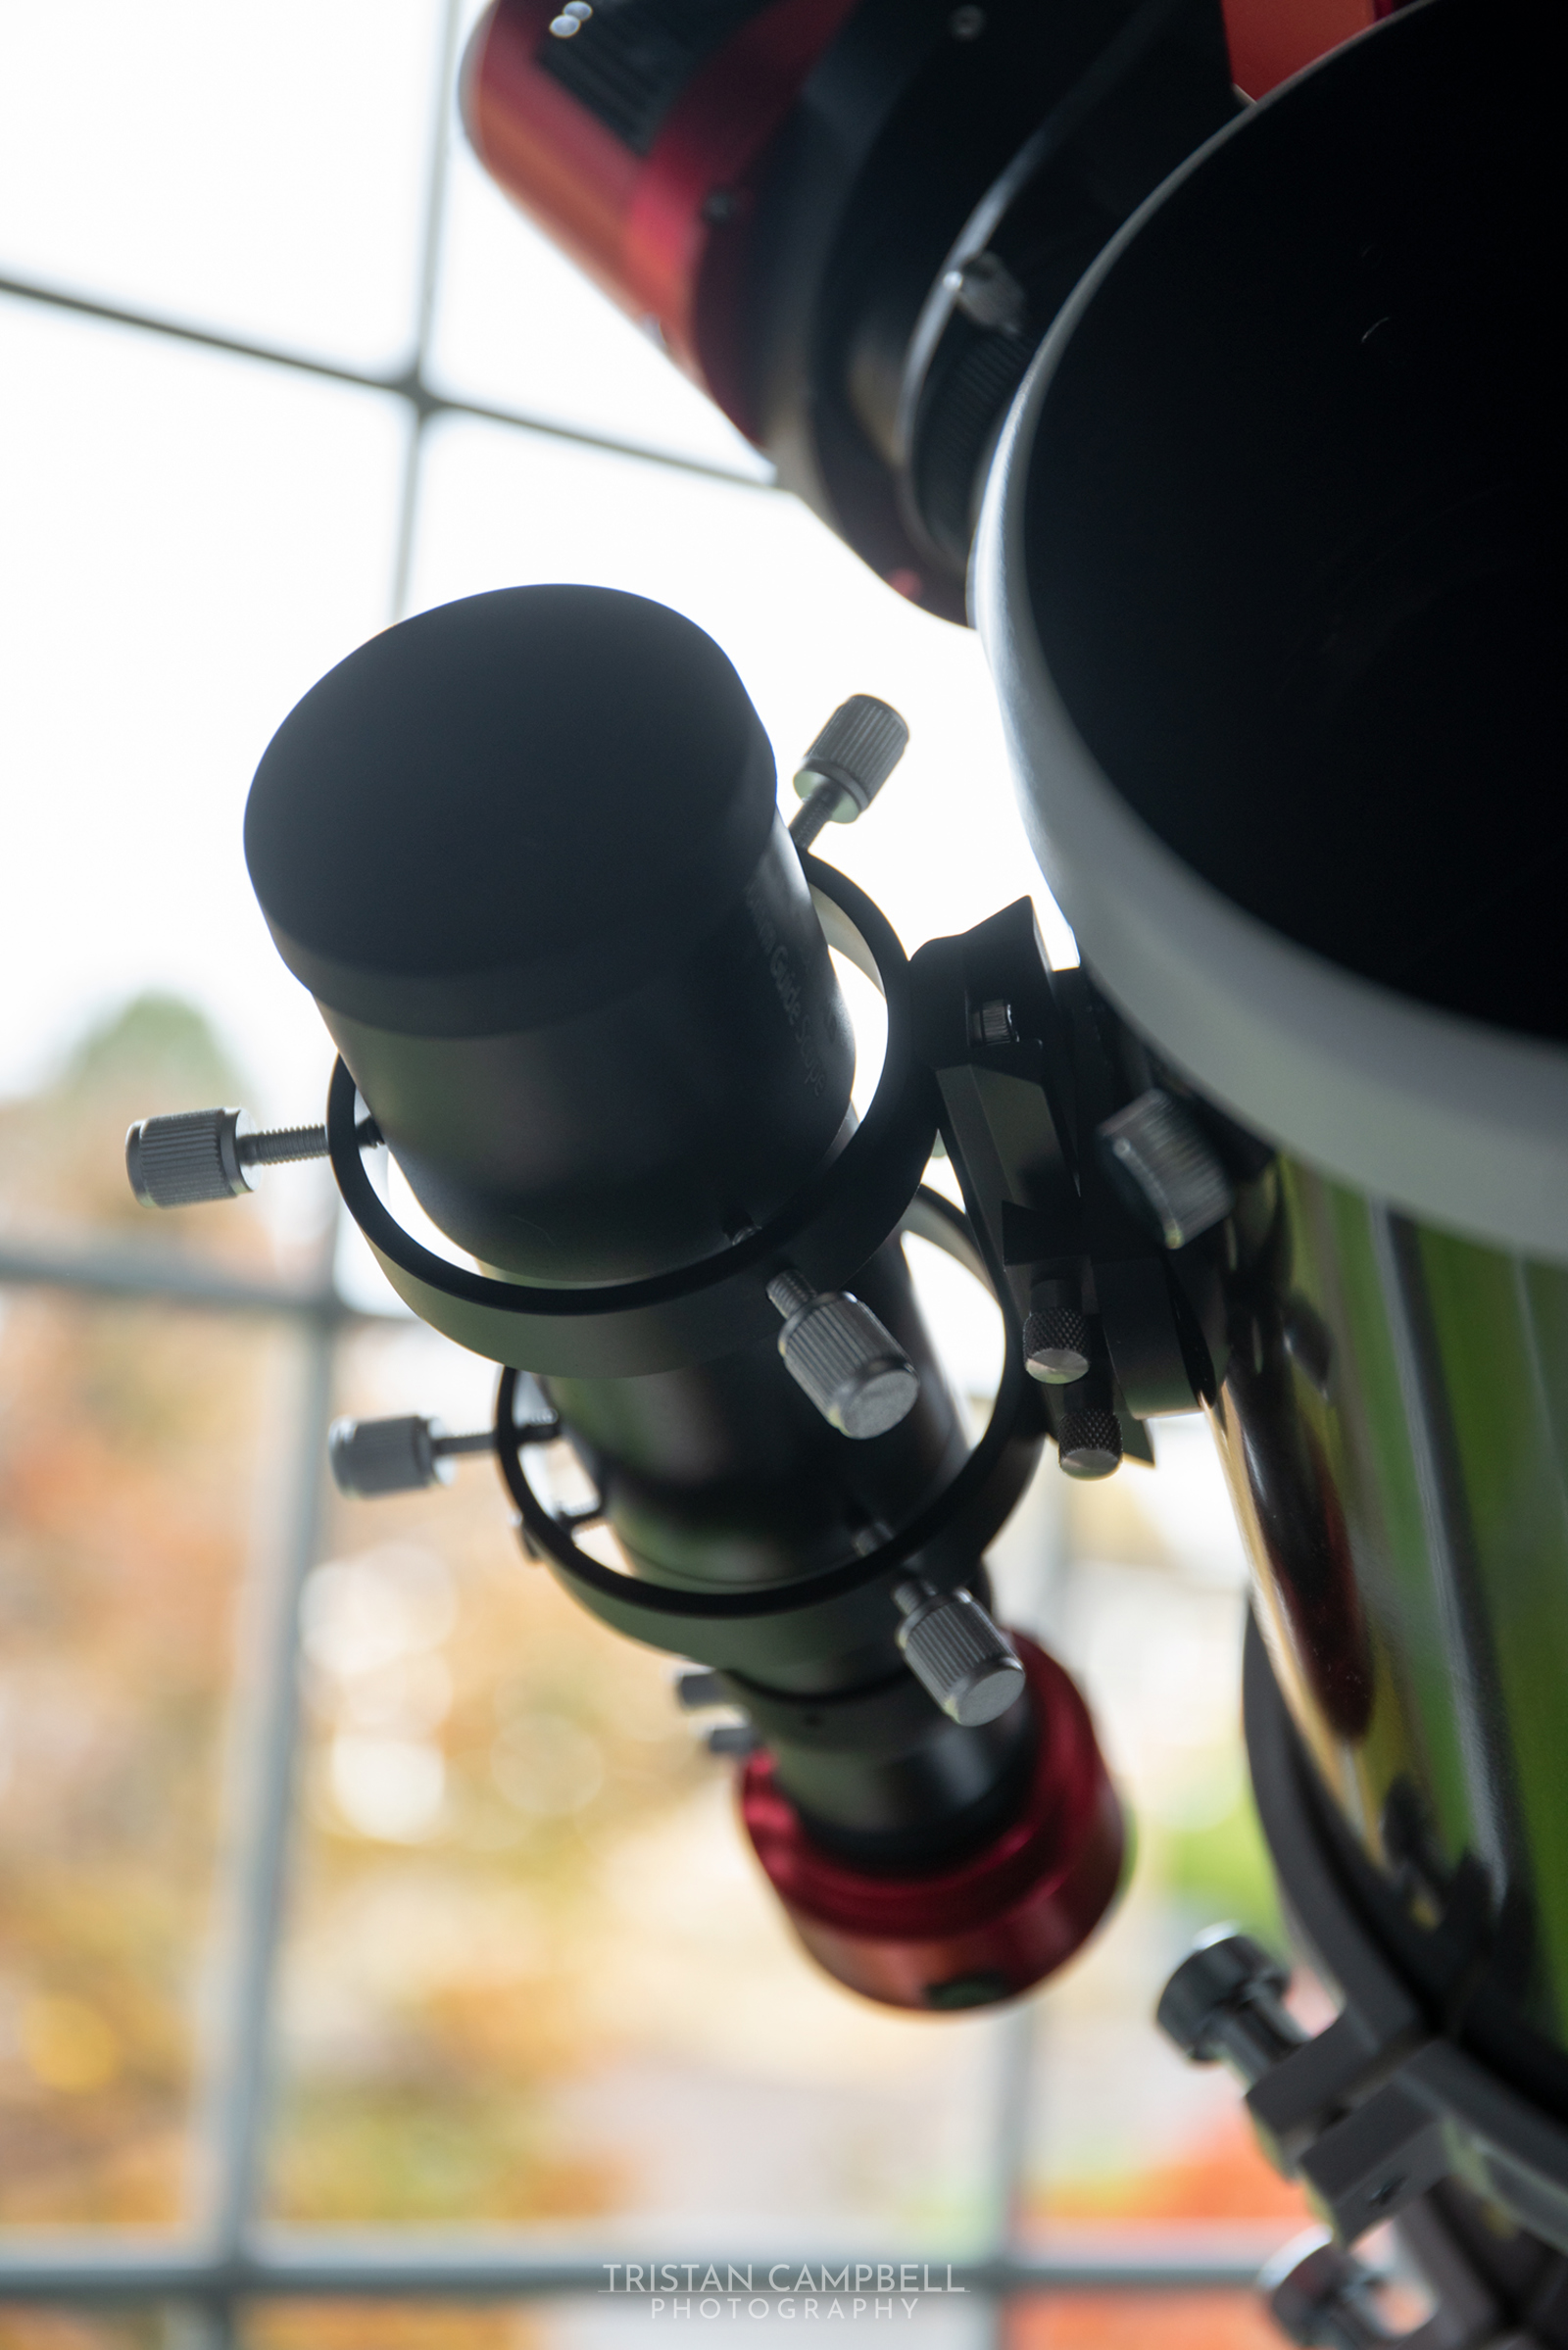
Finderscope / Guidescope
Much more important than the finder scope shoe is the finder scope itself. The 150PDS comes with a 6x30 finder scope that is of little use for astrophotography.
On my scope I've switched this out to an Astro Essentials 50mm finder scope. This pairs nicely with the ZWO462MC which I use for guiding.
Cooling Fan
See further down the page for a custom 3d printed cooling fan.
Focuser Draw Tube
Make this change last and only if you think you need it after making other mods. An alternative would be to switch out the focuser for a more sturdy model.
The draw tube of the focuser on the 150PDS is quite long and protrudes a long way inside the tube when you are at focus. This too can give stars odd pacman type shapes due to the focus tube intruding into the light path.
There are two solutions to this problem. The first is to move the primary mirror up the tube and the second is to shorten the drawtube.
I went with option two and hacksawed off about 18mm as it seemed the easier option. Before you do this figure out where the focus point for your setup is as it may vary depending which coma corrector you are using.
Note once you cut the end off the focus tube it's likely the draw tube will come off its rollers if you rack out focus too far. Fixing this would not be too hard but I've not got around to it. In the mean time you just have to be careful to limit how far out your auto focuser can go.
Further modifications
Modifying this scope is not yet complete so I'll update this page once they have been done. The next mod will be mounting a read fan behind the primary mirror. This mod serves two purposes - preventing tube currents and limiting any stray light from entering the tube from the rear mirror cell which is a known issue with this scope.
If you have any further mods to add to the list please get in touch.
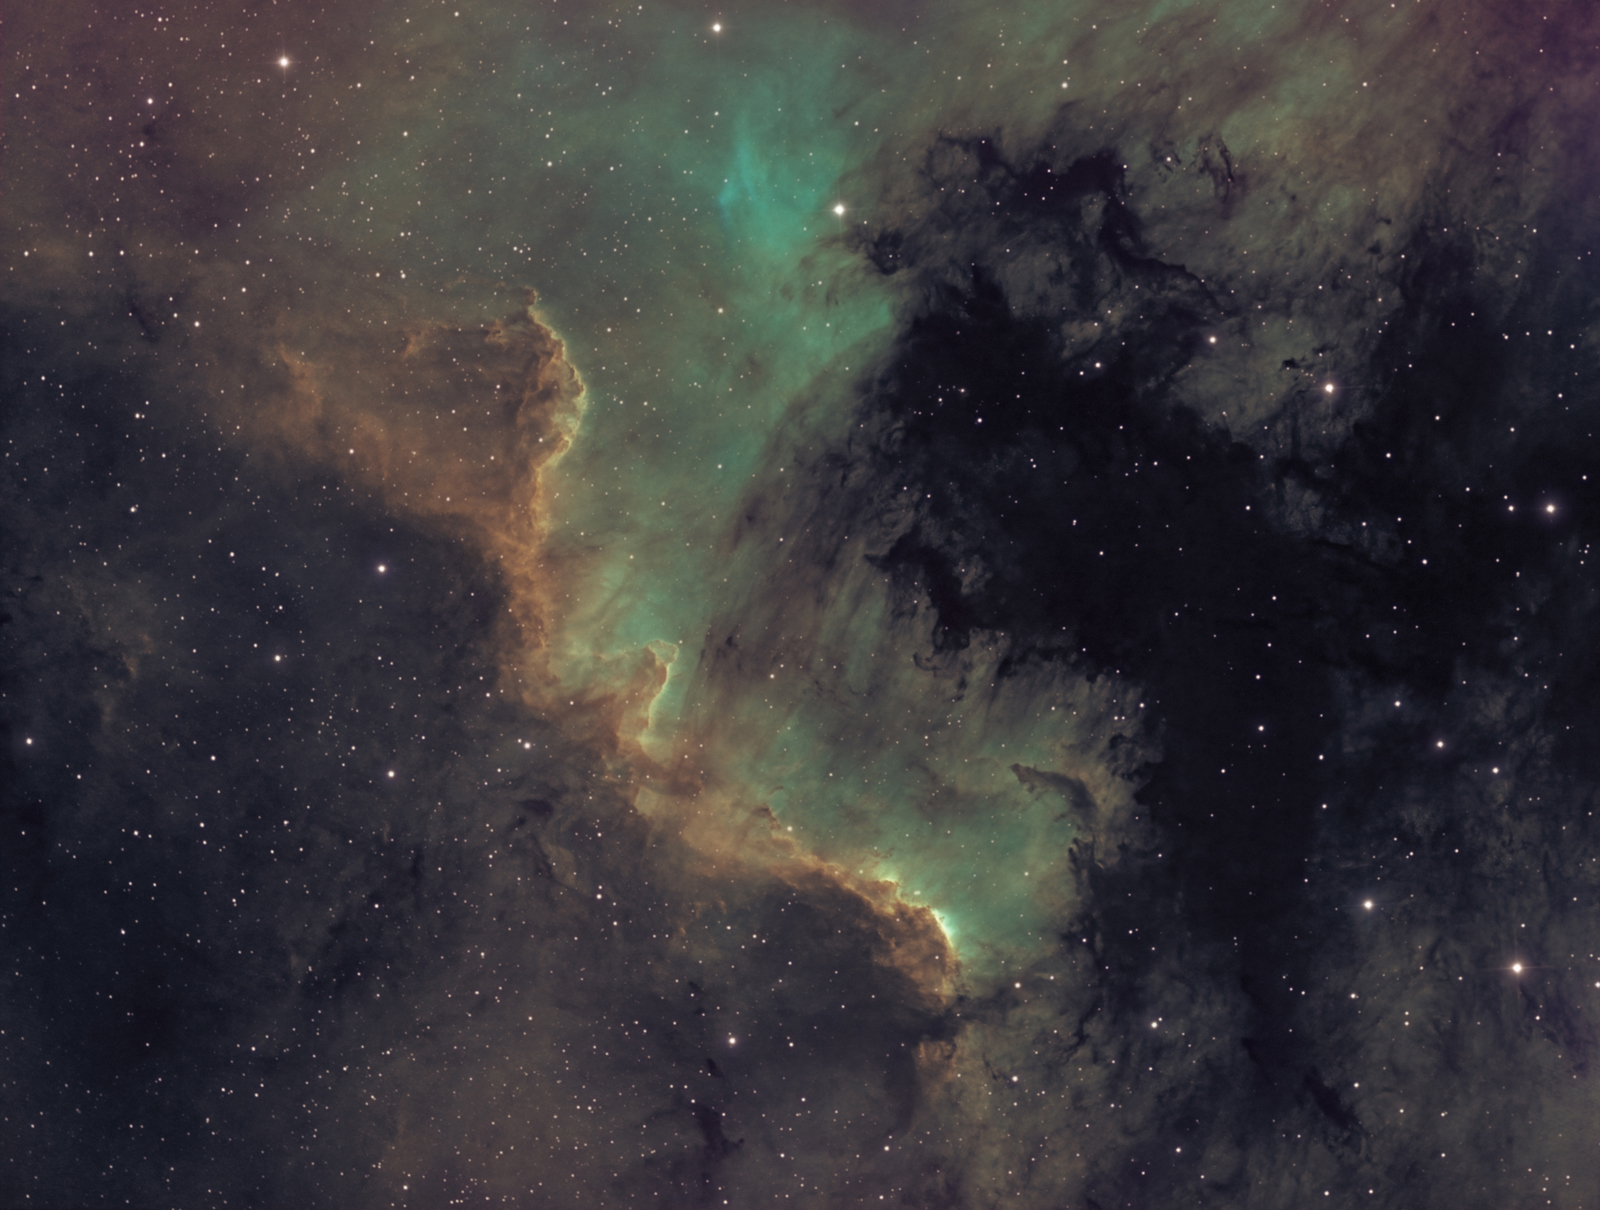
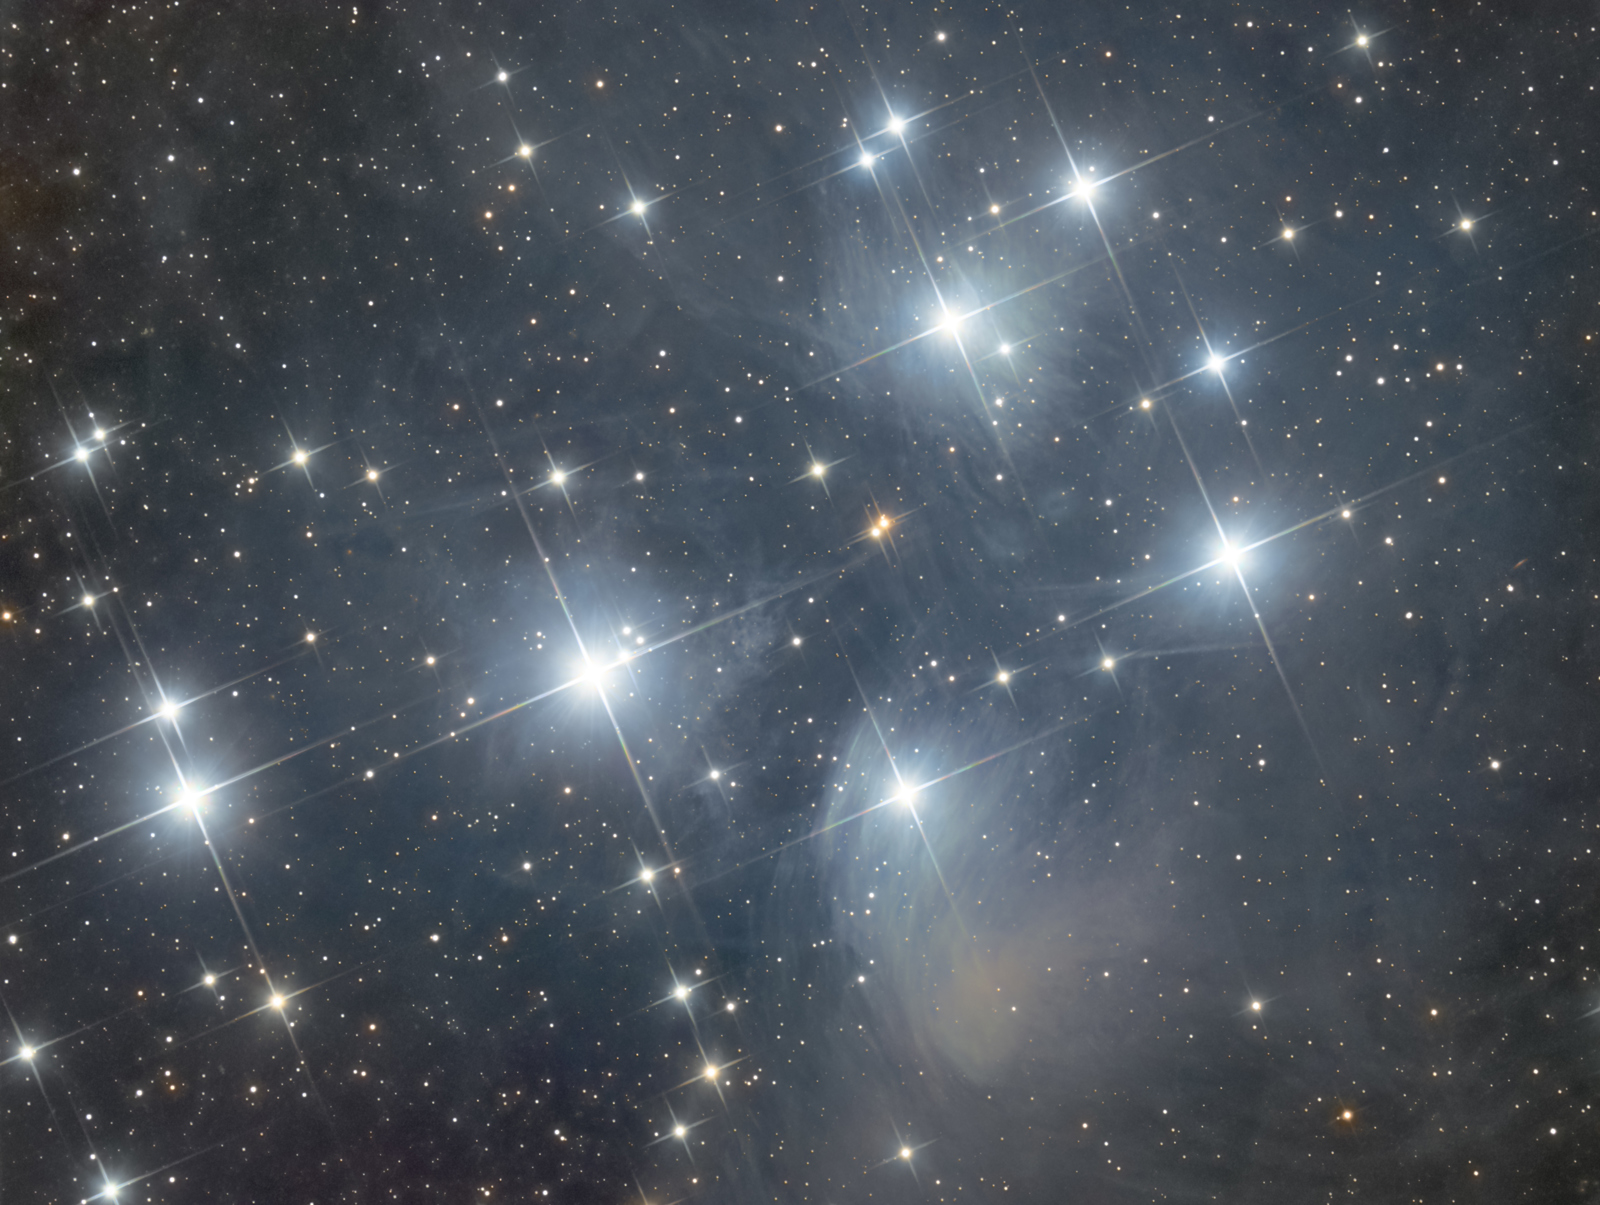
First light (30th October 2021)
After making the modifications the sky cleared and I had chance to test the scope for the first time. It was only clear for a few hours so this is only a three and a half hour exposure.
A few issues immediately came to light. First I'd overtightened the primary mirror clips which was causing star shape issues, loosening them off should hopefully fix this. The second issue was dew. There was a lot of water in the atmosphere and eventually everything dewed up - the secondary and even the primary mirror ...
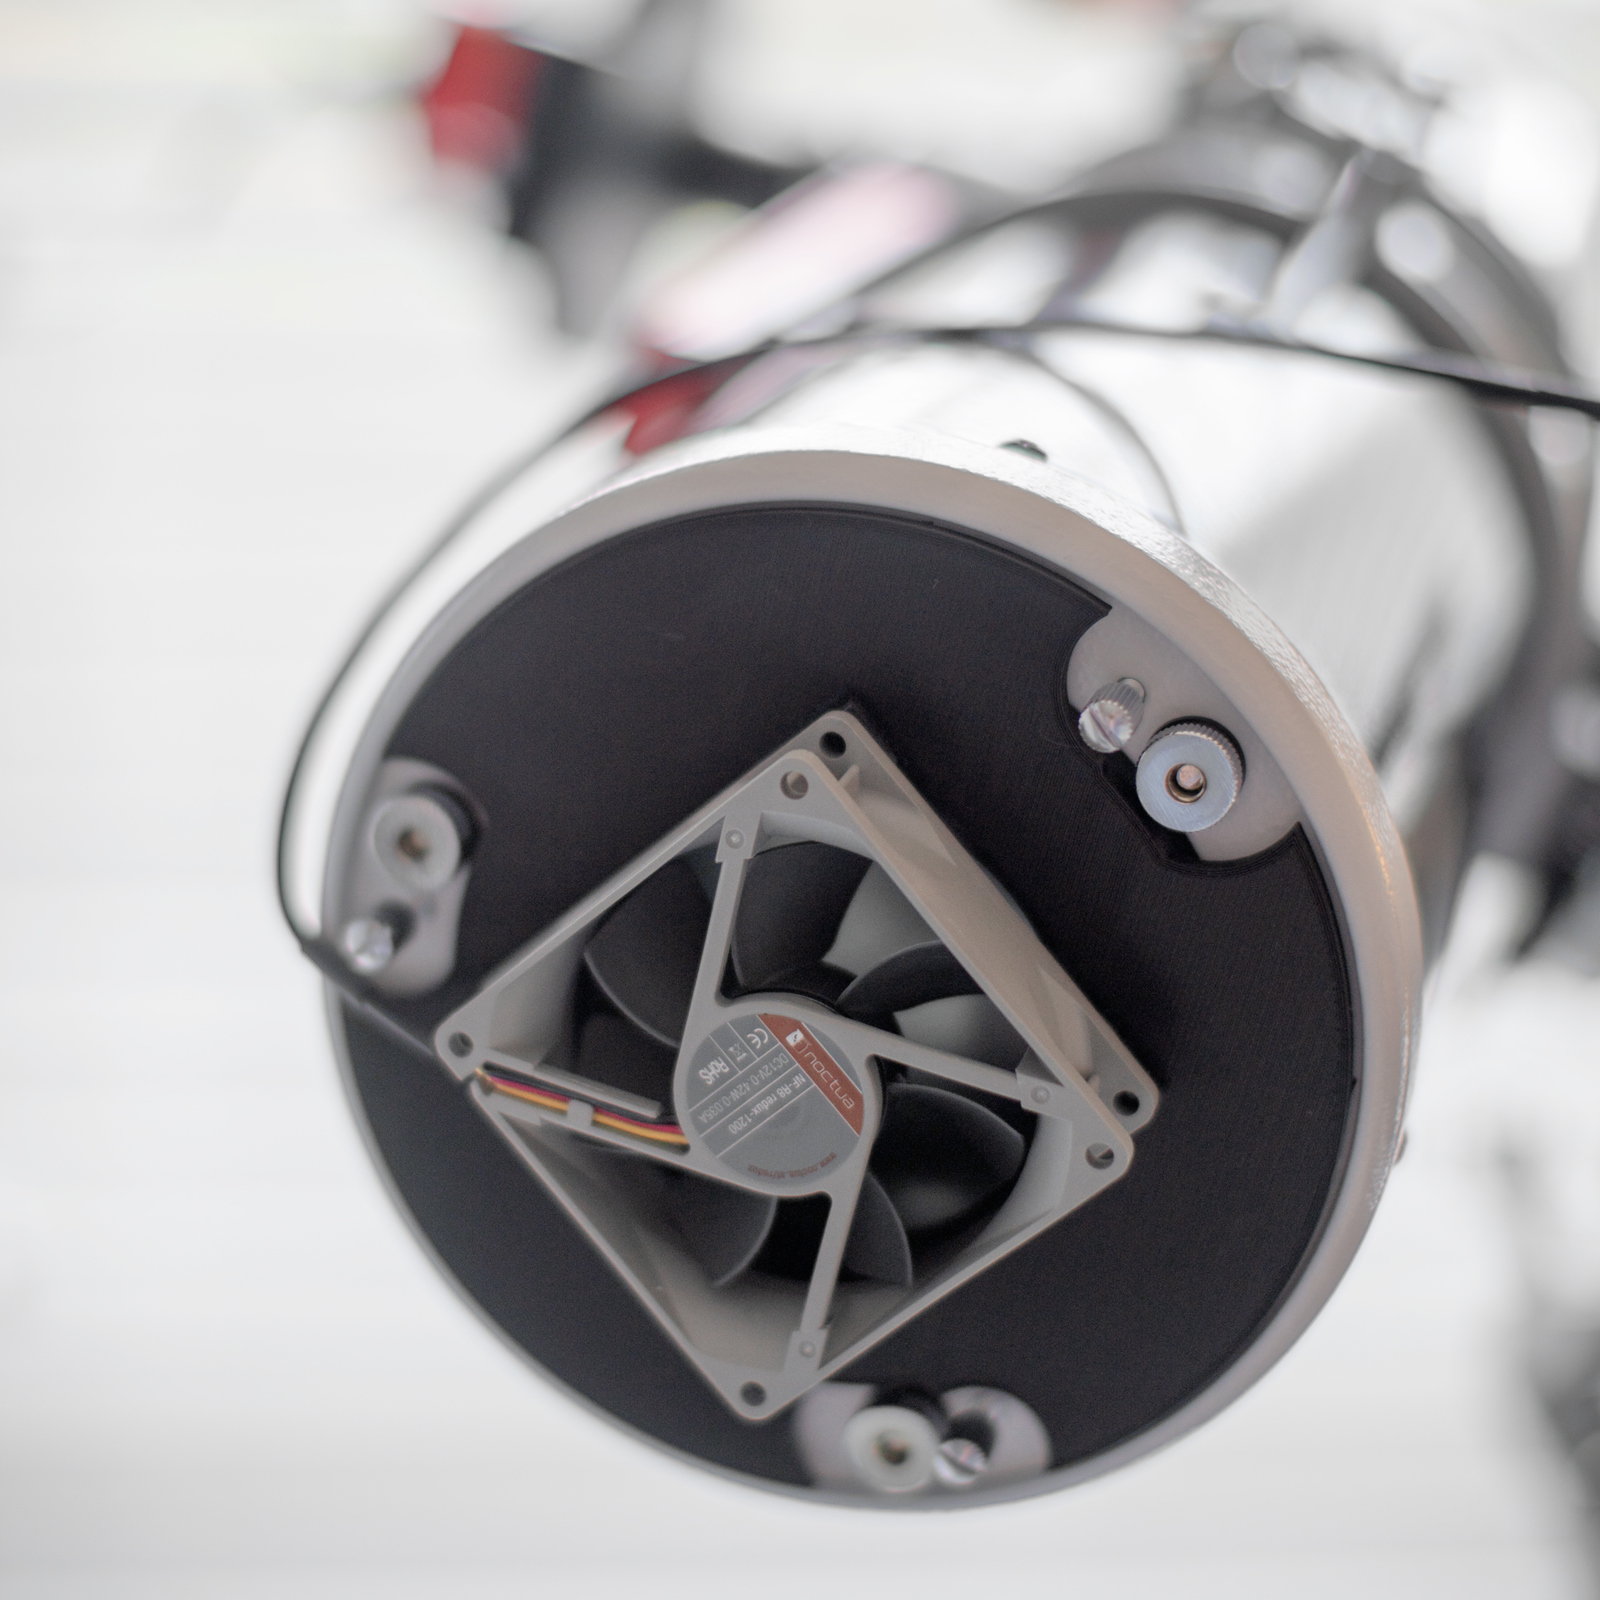
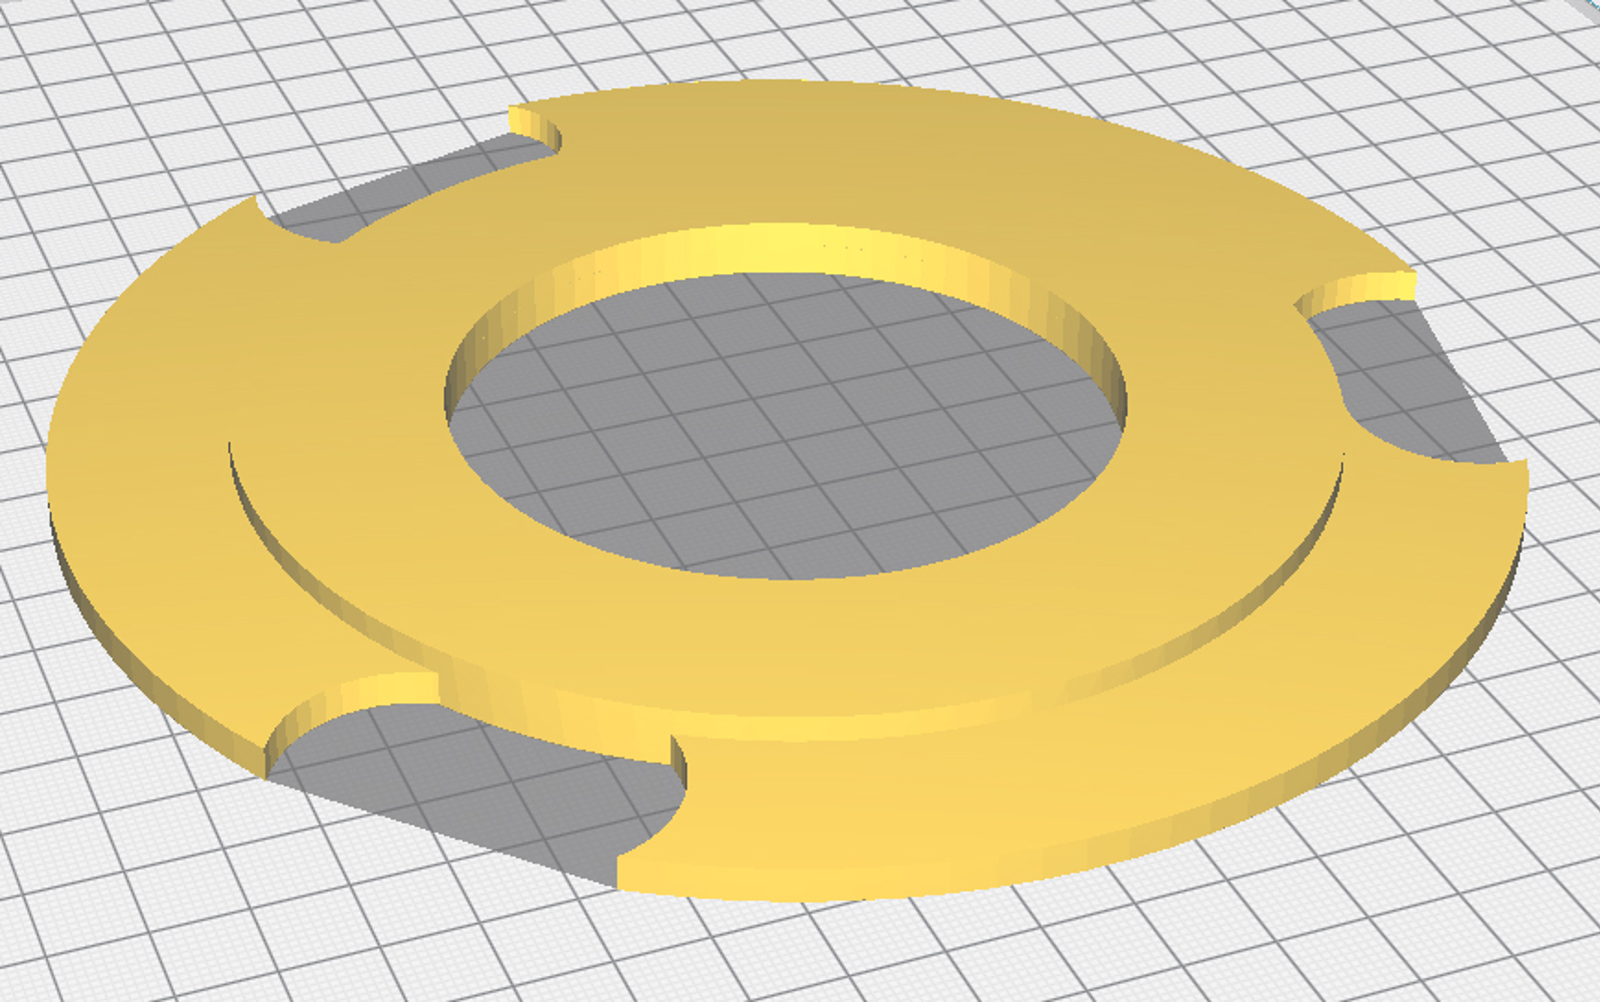
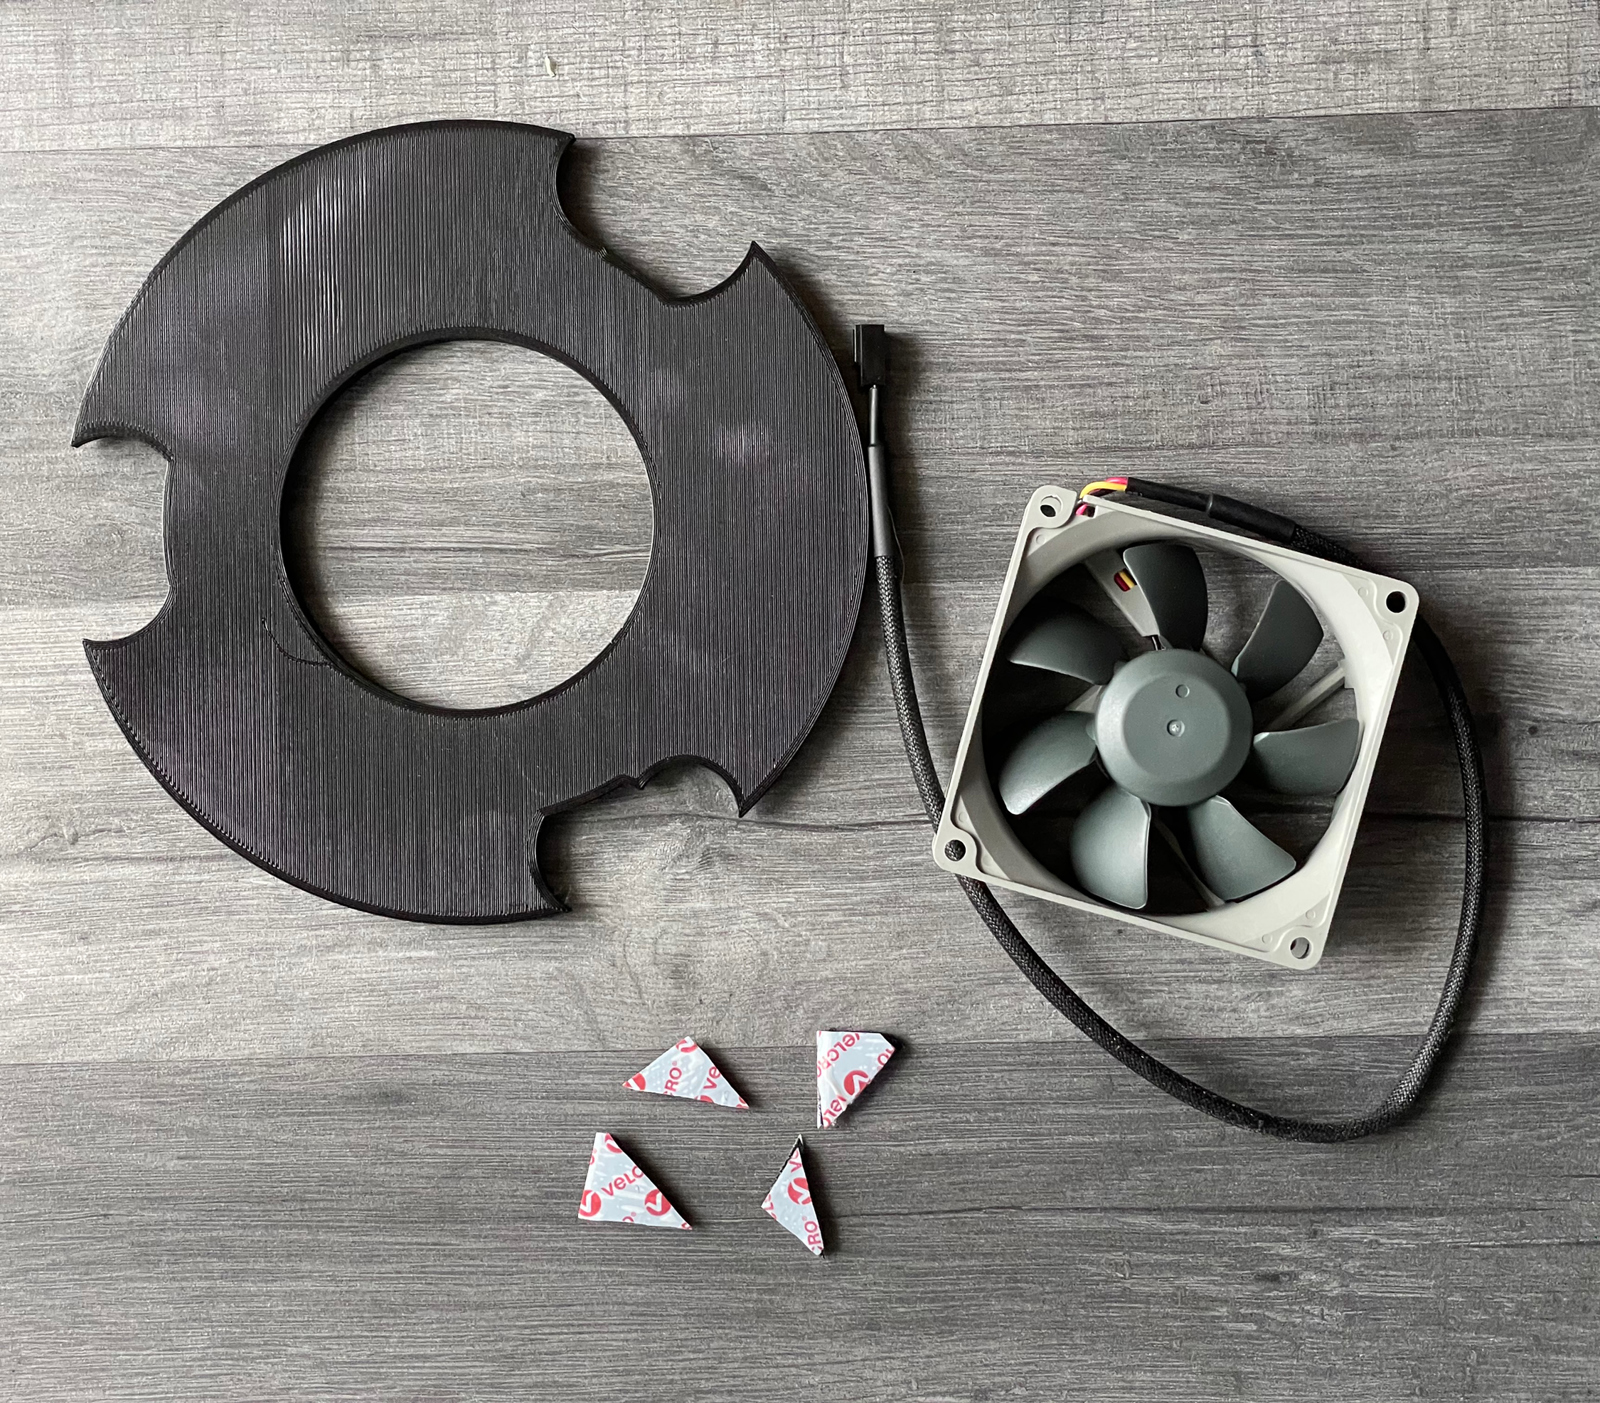
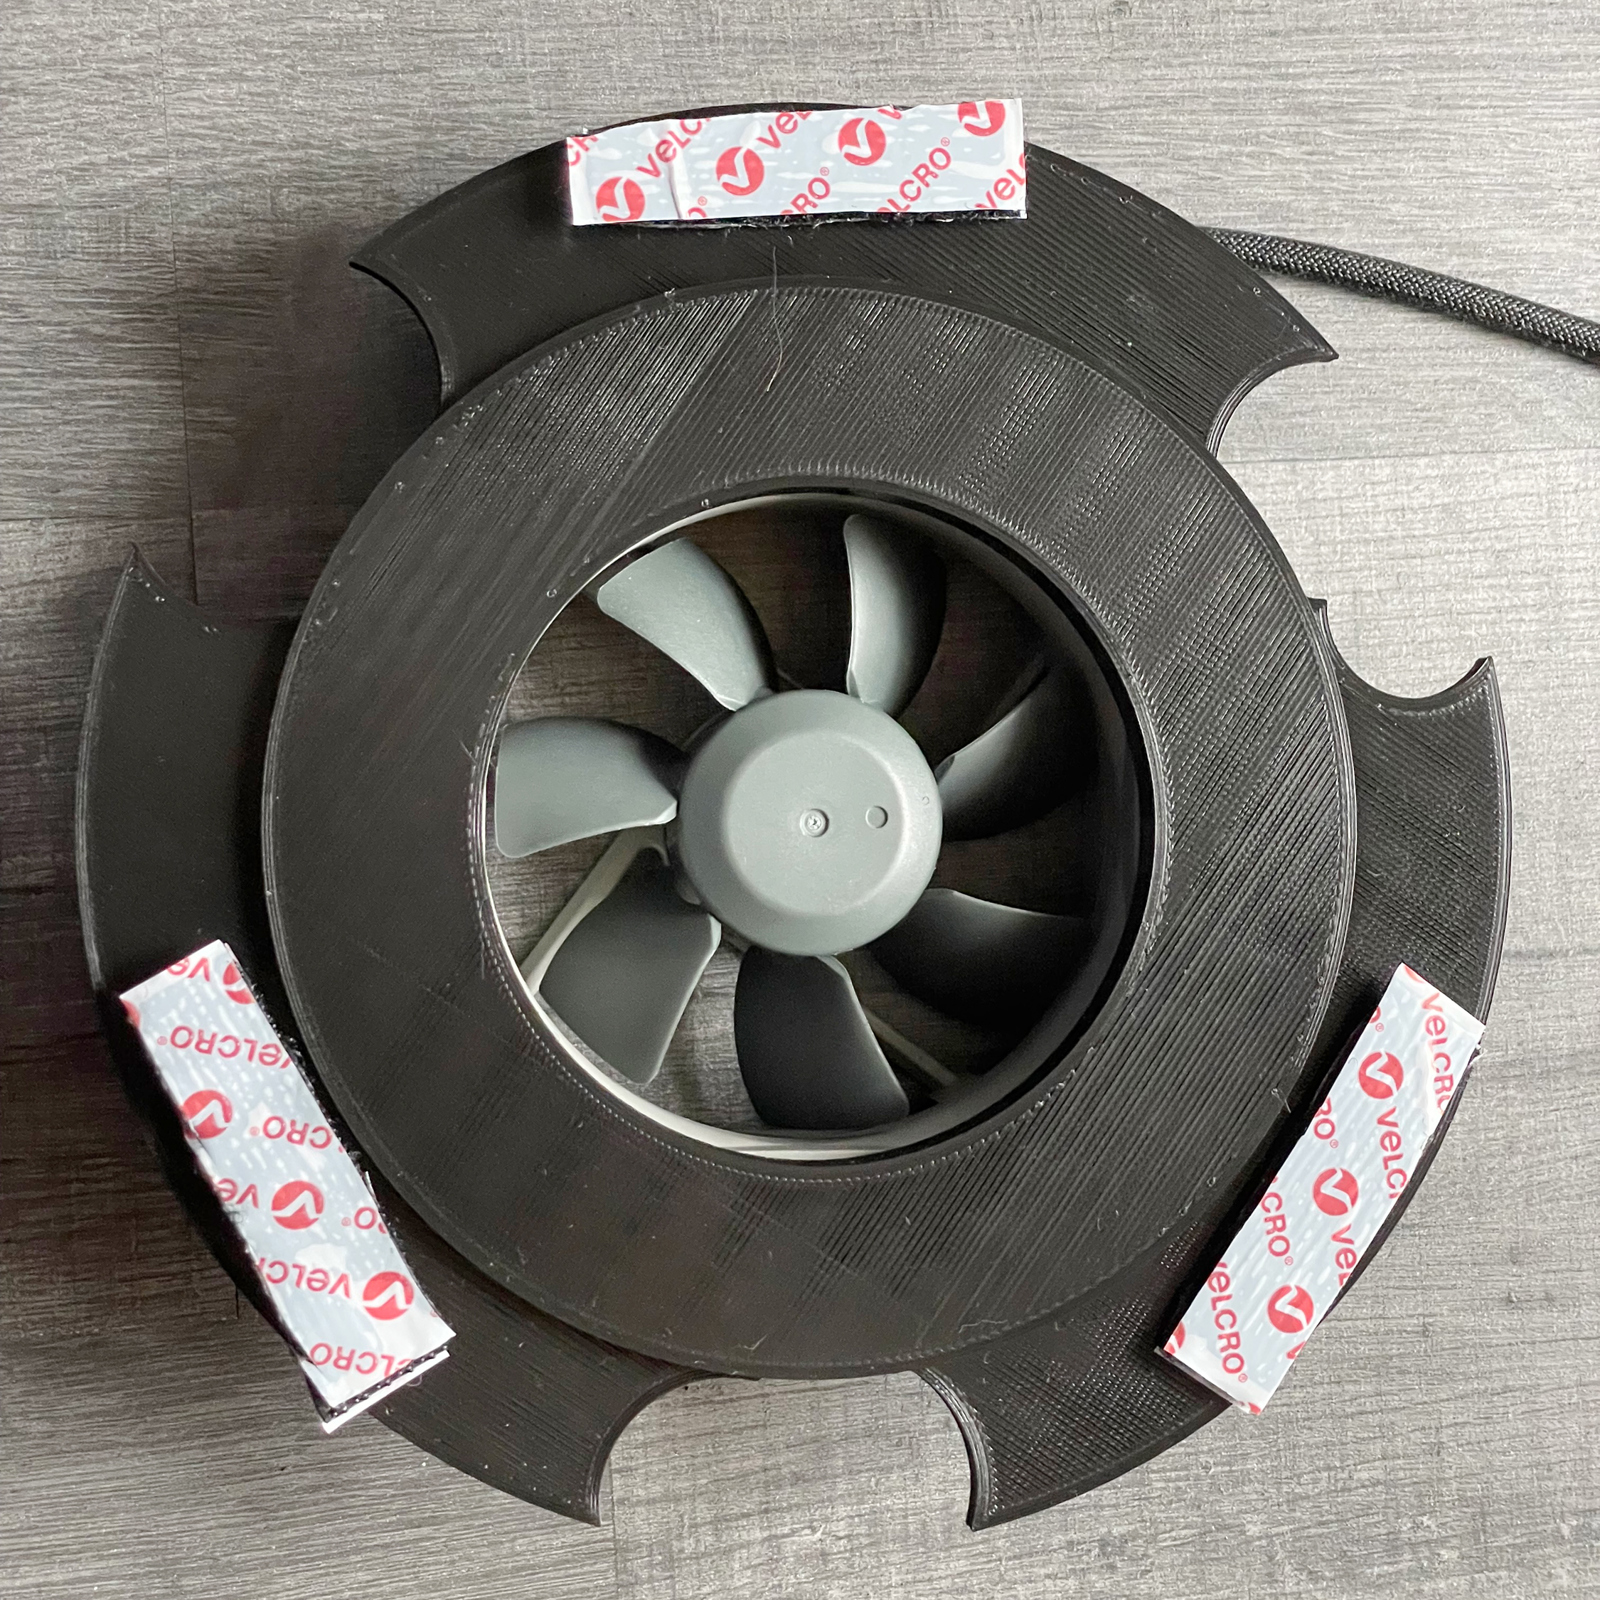
SkyWatcher 150-PDS Rear Cooling Fan Mod
As the whole scope dewed up after a few hours on first light (including the primary mirror) the next mod is a rear cooling fan for primary mirror. If this does not work the next mod may be some kind of tube insulation. It should also help minimise any light leaking into the back of the scope.
For the fan I bought an 80mm Noctua NF-R8 redux-1200, Ultra Quiet Silent Fan. This is attached to a 3D printed plate that I designed to still allows access to the primary mirror screws. You can download the STL file below should you want to print your own.
Dealing with dew
Even with the fan the scope was still having issues dewing up so I made further changes to help prevent this.
The first was to add a dew hood. For this I found an excellent dew hood for the 150PDS on thingiverse. Rather than using néoprène as suggested I only used the base part and then 3d printed a tube for the hood which makes for a nice solid dew hood. This was then flocked on the inside.
At the back of the scope I added a dew heater band around just above the primary mirror. These mods have largely eliminated dew problems. The secondary did still dew up towards the end of an autumn night of imaging recently so an additional secondary dew heater may be in need.
4th November 2021
Second light was M45 under very poor skies. It highlighted a new internal reflection problem and I don't know what the cause it. Next step will be to ensure everything in the tube is blacked out as there is bare metal exposed around the spider veins. Then I may look at creating a dew shield to limit any stray light from getting into the tube. Final image is a mixture of data from the 150pds and my RASA8 which was lost to a storm earlier in the year.

The 150P-DS was sold and replaced with a 150 Quattro. However more images can be seen from this scope taken by its new owner on astrobin.